
Documentation · Multipurpose Theme 1.61.40
The Multipurpose Dashboard, tab by tab.
A complete reference for the Multipurpose Theme: installing it, entering your license, picking a site template, and every setting on all fourteen dashboard tabs.
Released version 1.61.21
Current release setup and checks
Configure the Multipurpose Theme dashboard, header, footer, fonts, color modes and site templates.
- Maintenance Mode includes animated Matrix Code and Interior design photographs with paired content templates.
- The General tab no longer exposes Layout and responsive behavior fields. Previously stored values continue rendering, but those removed controls are no longer editable in the dashboard.
- The three-line menu icon appears when navigation collapses, in overlay mode or below the mobile breakpoint. It is hidden beside a full desktop navigation menu that fits.
- The dashboard Plugins tab shows each plugin version next to its title, and the dashboard uses the same font as the wp-admin menu.
- The Footer tab supports a default and light logo pair. The Colors tab has a switch for using its per-mode logos instead of the Header tab logo.
- The Floating pill header overlays page content. Preview the first section beneath it on desktop and phone.
Check your setup
- Configure header, footer and fonts on their dashboard tabs. Do not assume removed General layout controls are available.
- Preview a representative page on desktop and phone in both color modes after a theme update. Keep an export of the prior settings.
Quick start
Up and running in minutes
Step 1
Install and activate
Appearance, Themes, Add New, Upload Theme. Choose multipurpose-theme-1.61.40.zip and click Activate. The child theme installs itself on the next admin page.
Step 2
Enter your license
Multipurpose Dashboard, Welcome. Paste your bundle key into License key and click Activate. One key covers the theme and every Revolutionary plugin.
Step 3
Install Revolutionary Blocks
Multipurpose Dashboard, Plugins. Tick Revolutionary Blocks (required for templates) and any other plugins you want, then Install selected.
Step 4
Pick a site template
Multipurpose Dashboard, Theme Templates. Find your industry, open the preview, and click Install.
On this page
Start here
Getting started
The theme needs WordPress 6.0 or later and PHP 8.0 or later. Everything described here is on the Multipurpose Dashboard menu in wp-admin, at admin.php?page=revdash-dashboard, with one tab per area.
The child theme
After you activate the theme, it downloads the Multipurpose child theme, installs it and switches the site to it on the next admin page load. Put your own CSS or PHP in the child theme so it survives updates to the main theme. The download uses your license.
The tabs
| Tab | What it covers |
|---|---|
| Welcome | Getting started links, site at a glance, license key |
| General | Company name, favicon, timezone, social links, custom CSS and JavaScript |
| Colors | Brand colors, gradient, color mode, touch targets |
| CTA Buttons | Button fill, text, border, shape, size and hover |
| Header | Layouts, navigation styles, top bar, banner, logos, custom header |
| Footer | Layout, branding, contact details, columns, custom footer |
| Fonts | Custom fonts, heading sizes, performance switches |
| Login Page | The wp-login.php designer |
| Theme Templates | The site template store |
| Google Analytics | GA4, Search Console, PageSpeed and reports |
| Tools | Update check and shortcuts |
| Plugins | Install Revolutionary plugins |
| Maintenance Mode | The maintenance page |
| System Info | Environment details and PDF export |
Tab 1
Welcome
Your starting point, and where the license lives.
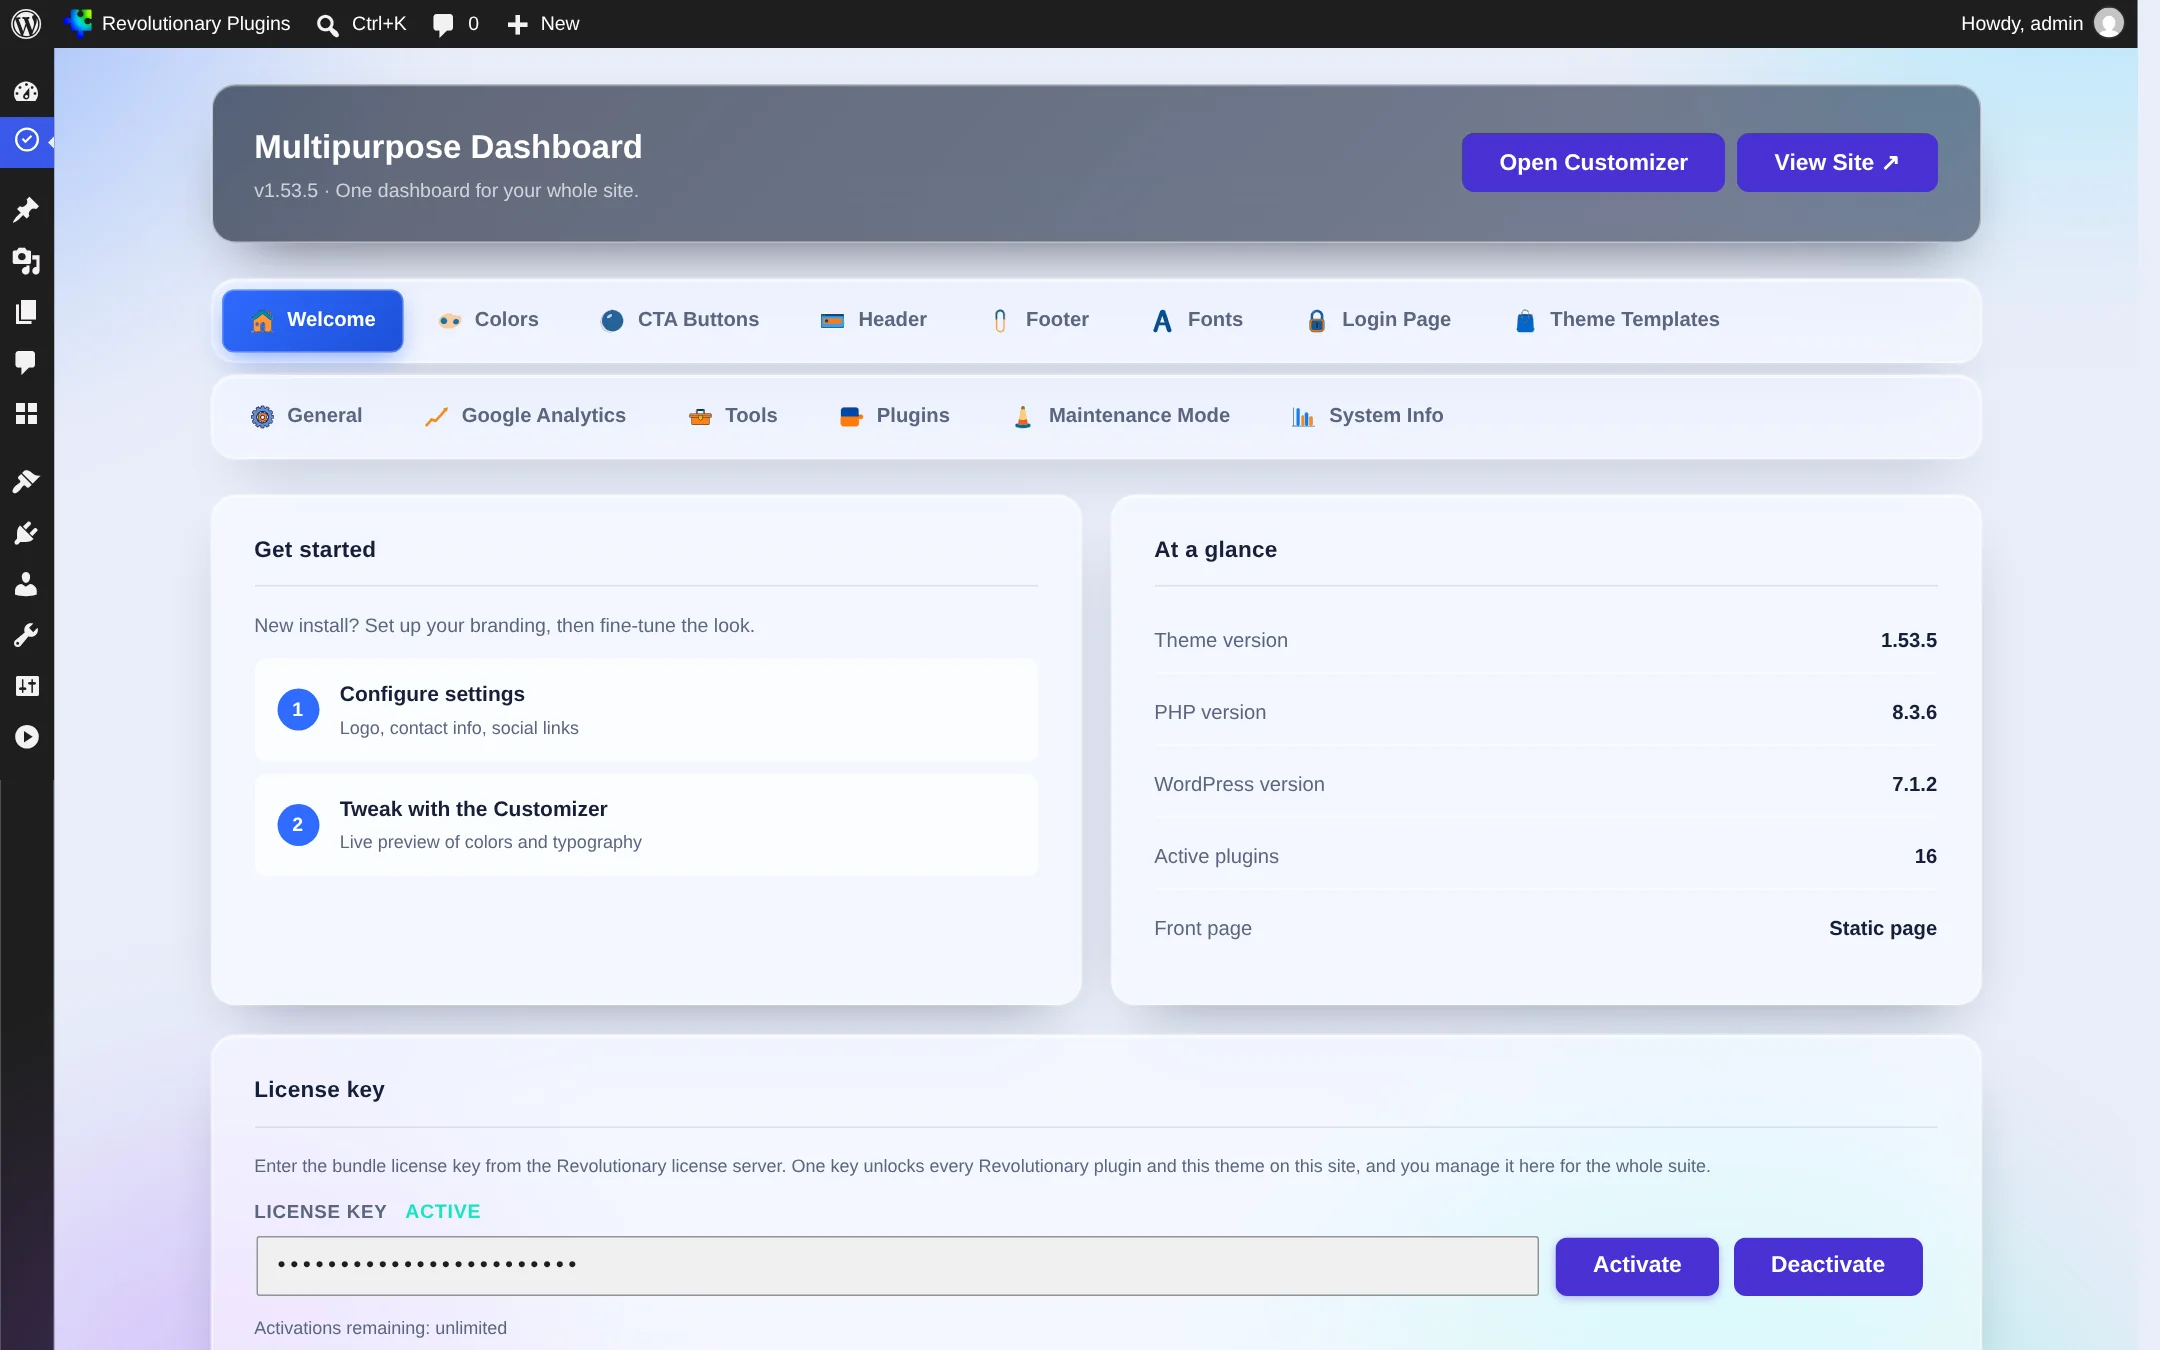
- Get started links to the General tab for your logo, contact details and social links, and to the Customizer.
- At a glance shows the theme, PHP and WordPress versions, how many plugins are active, and what your front page shows.
- License key shows Active, Inactive or expired, or No license, with Activate and Deactivate buttons.
Activating your license
- 1. Copy your bundle key from your account.
- 2. Paste it into License key on the Welcome tab.
- 3. Click Activate. The status changes to Active.
One key activates the theme and every Revolutionary plugin on the site and turns on their updates. The key is shown masked to its last four characters once saved.
Tab 2
General
Site-wide details used across the theme.
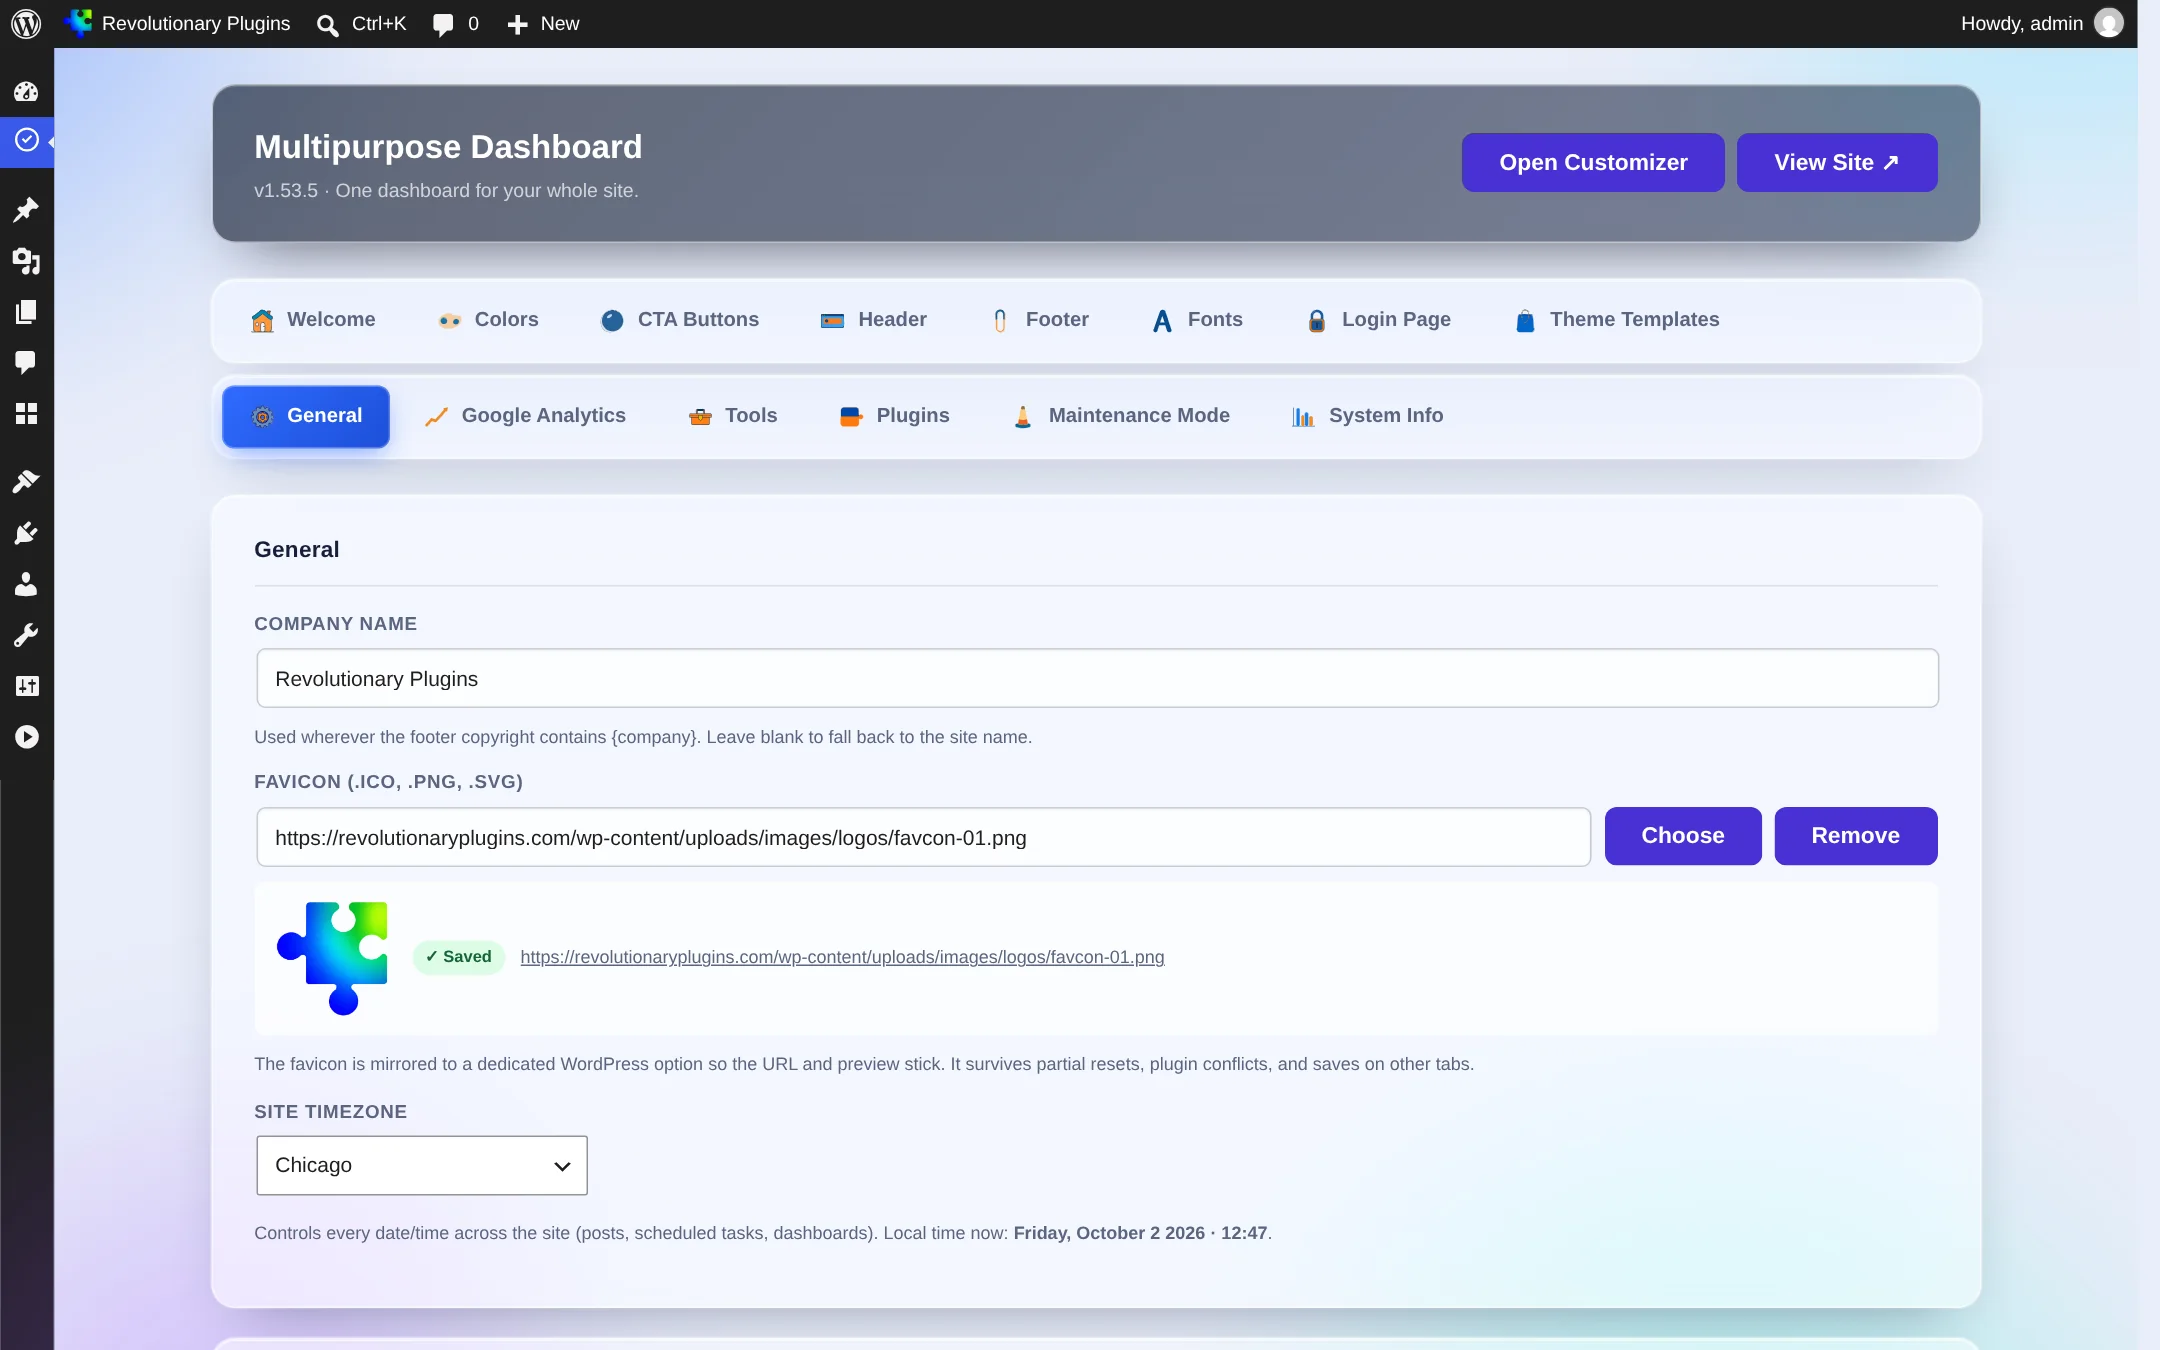
| Setting | What it does |
|---|---|
| Company name | Used wherever the footer copyright contains {company}. Blank falls back to the site name. |
| Favicon | An .ico, .png or .svg icon for browser tabs. |
| Site timezone | Sets WordPress's own timezone, so every date and schedule on the site follows it. |
| Social links | Your social profiles, which the top bar can show as icons. |
| Custom CSS | Extra styles added to every page. |
| Custom JavaScript | Output inline on the front end. Use carefully. |
Reset to defaults returns the dashboard settings to the theme's defaults.
Tab 3
Colors and color mode
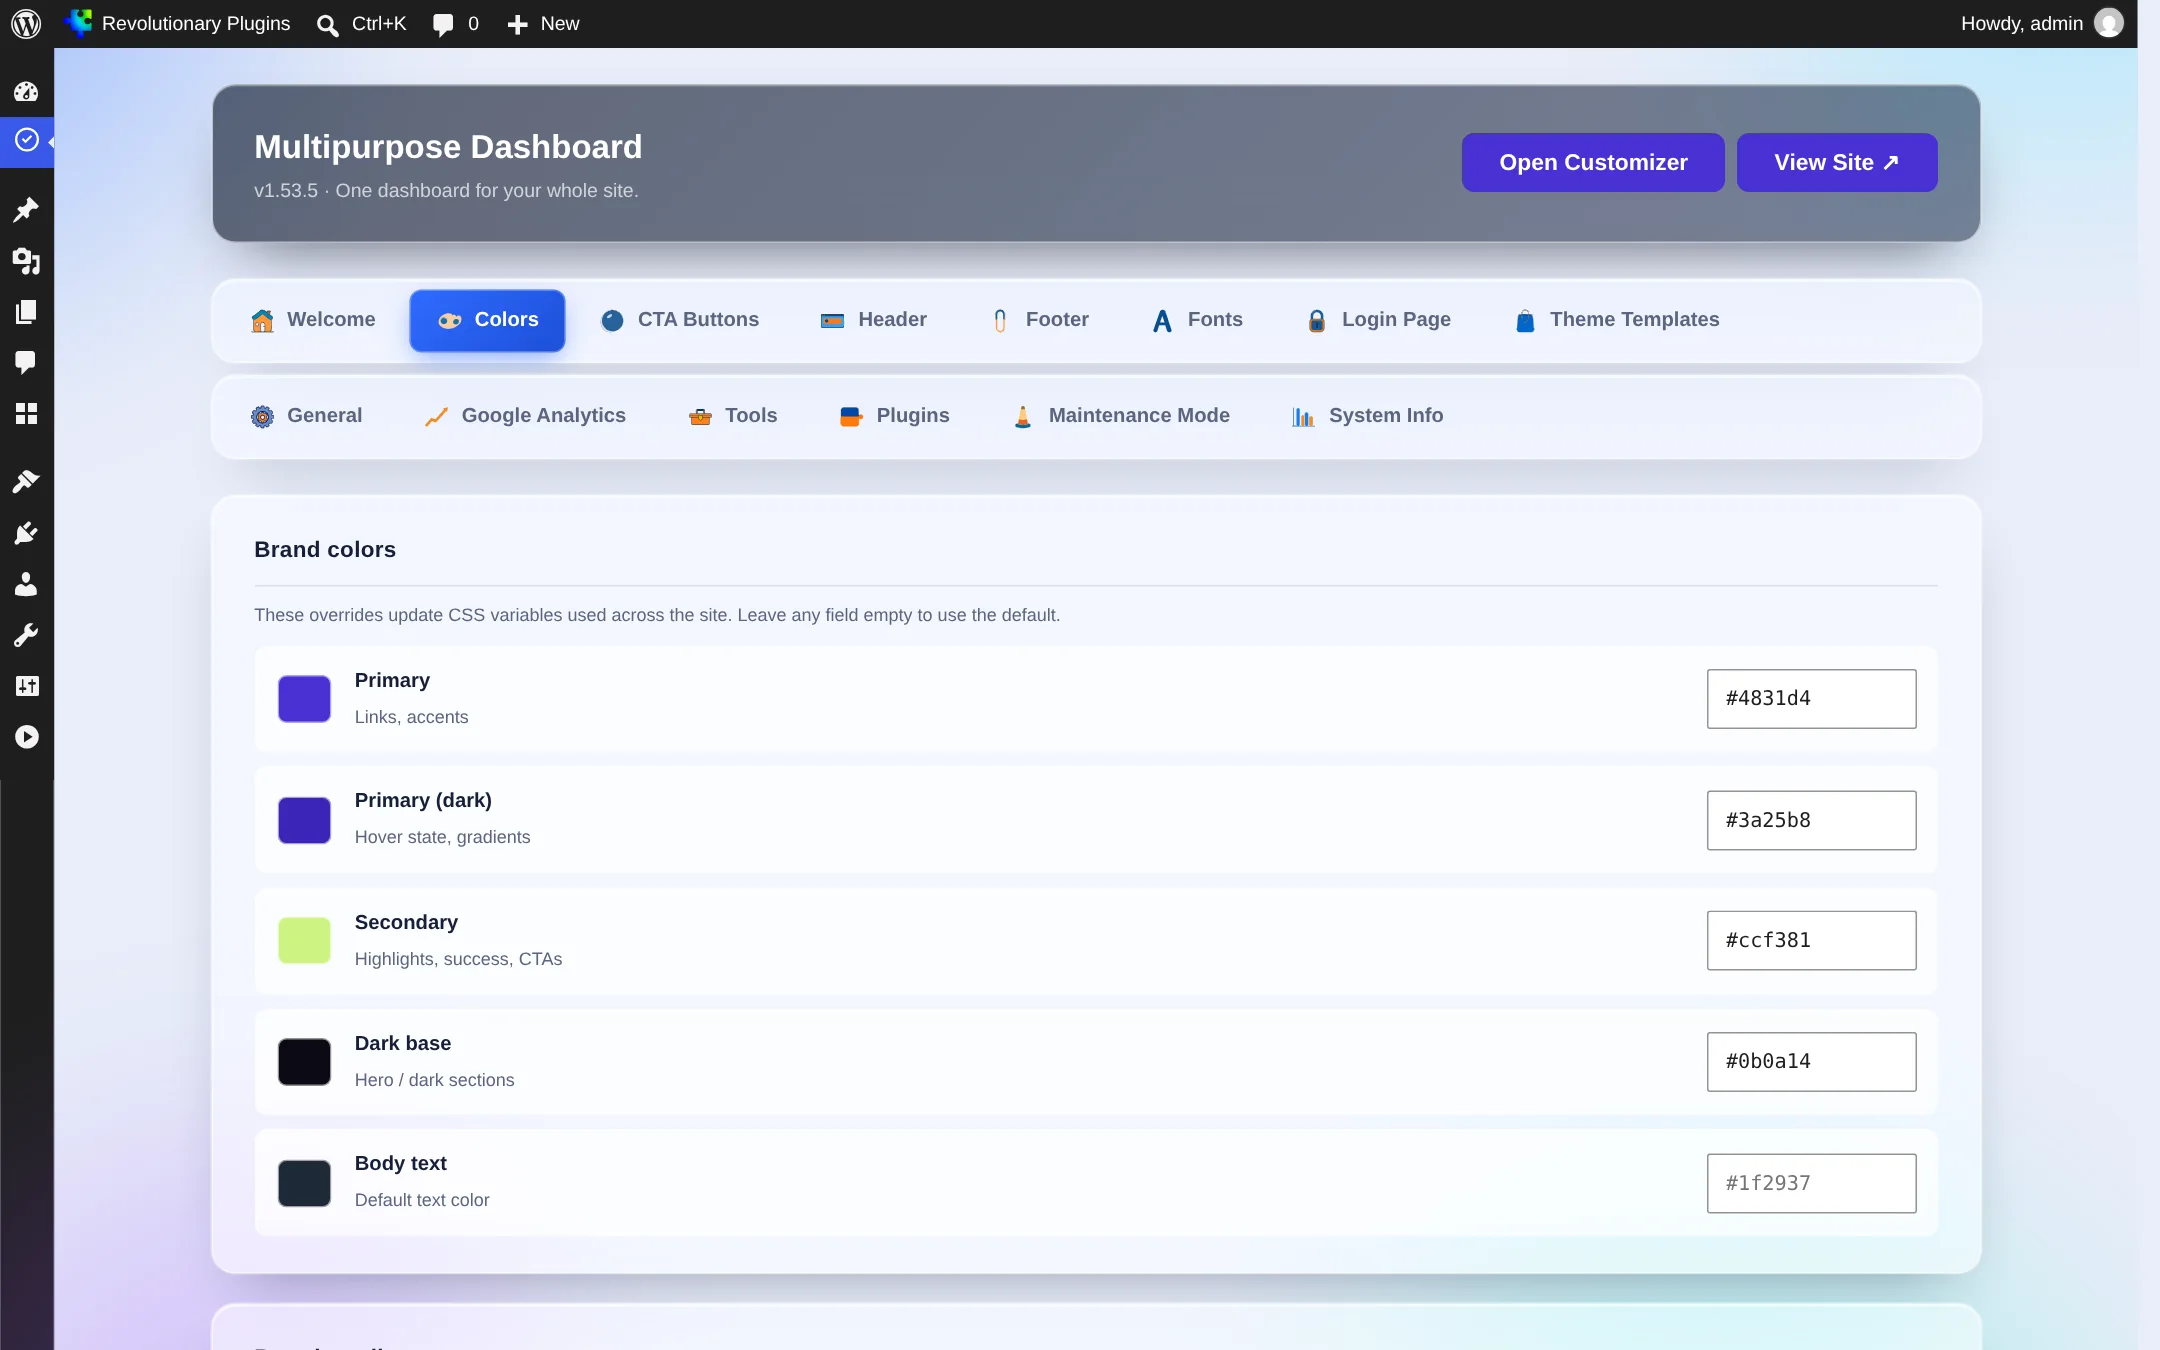
Brand colors update CSS variables used across the whole site. Leave a field empty to keep the default.
Brand colors
| Color | Used for |
|---|---|
| Primary | Links and accents |
| Primary (dark) | Hover states and gradients |
| Secondary | Highlights, success states and calls to action |
| Dark base | Hero and dark sections |
| Body text | Default text color |
Brand gradient
Runs from Primary to Secondary by default. Add your own colors and choose the direction.
Color mode
- Off keeps one color scheme. Light and dark, with a visitor toggle turns it on.
- Default for new visitors: follow their device setting, or always start dark or light.
- Toggle button: on the right of the header (and in the mobile menu), or off so you can place it yourself with [revdash_color_mode_toggle].
- A ten-color palette for each mode.
- A logo for each mode: a light-colored logo for dark mode and a dark-colored logo for light mode.
Accessibility
Minimum touch target 44px on phones makes links and buttons easier to tap on small screens.
Tab 4
CTA Buttons
The look of primary and call-to-action buttons across the site, with a live preview you can hover.
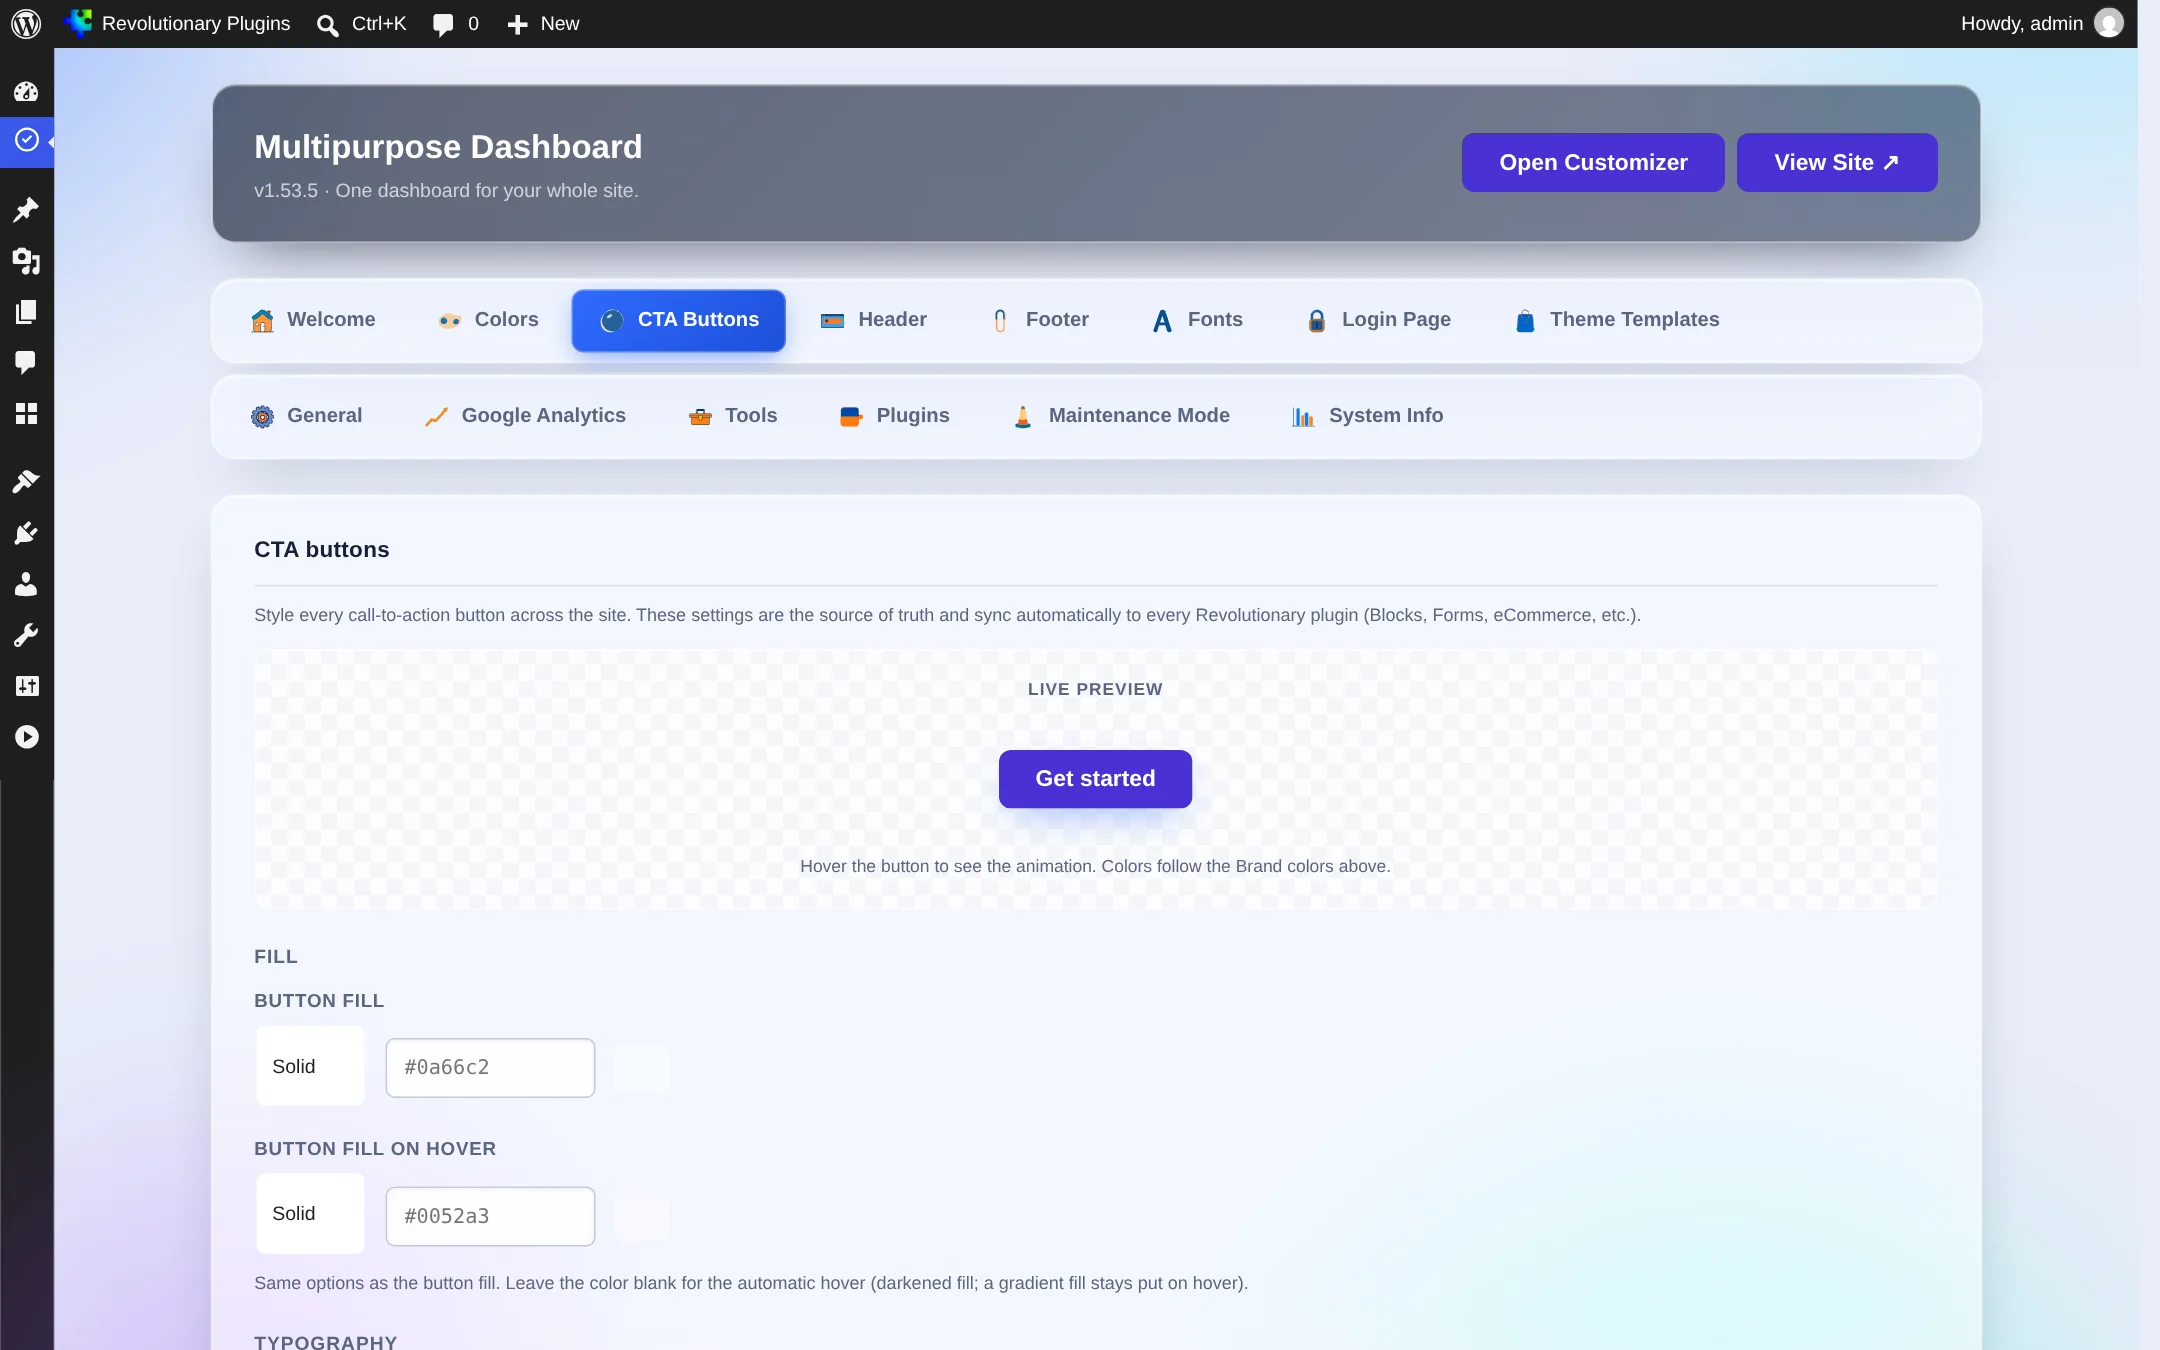
- Fill: button color and hover color.
- Typography: font, text color and hover color, letter case and font size.
- Border: on or off, and its color.
- Corner shape: Rounded (8px), Soft (16px), Pill or Square.
- Size: Super Small, Compact, Standard or Large.
- Hover animation: Lift, Grow, Tilt, Slide, Glow, Shine or Pulse.
Tab 5
Header
The biggest tab: layout, navigation style, top bar, banner, logos and menus.
Layouts
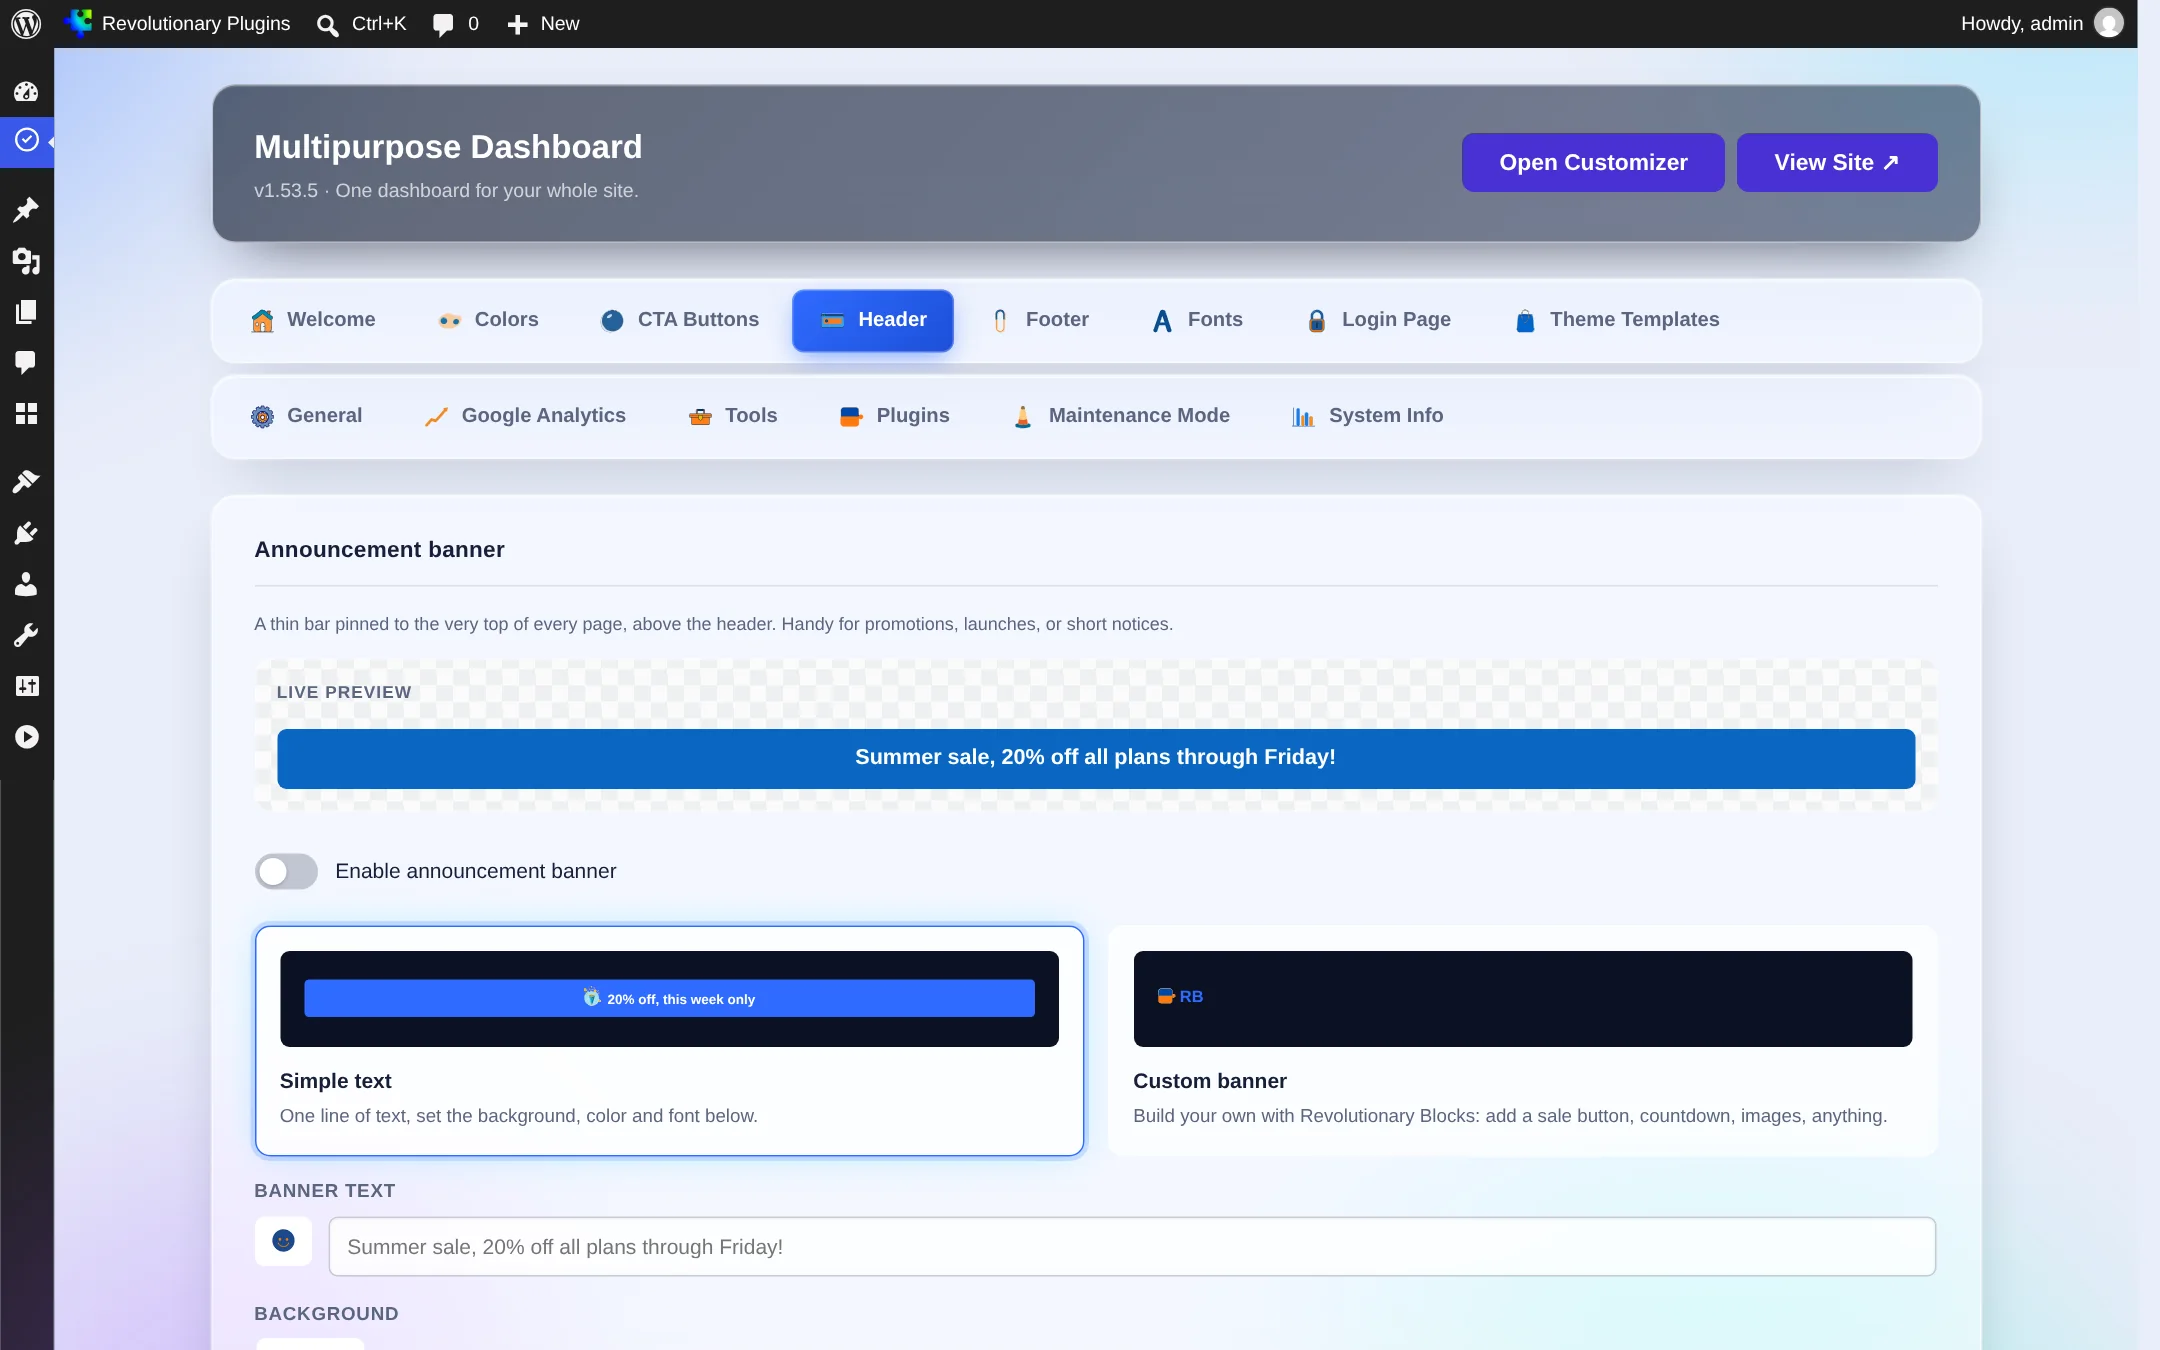
Center, Right, Stacked, Split logo, Two-row, Hamburger overlay, Showcase menu, Command search, Side header (left or right), Icon rail and Bottom dock. Choose Custom to build your own header in Revolutionary Blocks, starting from example headers.
Navigation style
- Header shape: Classic, Floating pill, Frosted glass or Boxed.
- Menu link style: 27 effects, from Default and Underline to Marker, Neon, Glitch and Shine.
- Dropdown style: Classic, Minimal, Panel, Mega menu or Image preview.
- Mobile menu: Fullscreen fade, Big staggered type, Circle reveal, Drawer left, Drawer right, Bottom sheet or Bottom tab bar.
- Hide on scroll: hides the header while scrolling down and brings it back when scrolling up (needs the sticky header).
Top bar and banner
The top bar shows hours, phone, email and optionally your social icons above the header, and has its own menu location. The announcement banner can be plain text or built in Revolutionary Blocks.
Everything else
- Header CTA button with your own text and link.
- Transparency and sticky: a transparent header on the home page, and a header that stays on screen.
- Logos, including a separate logo height for phones.
- Header widgets and the menu assigned to the header.
Tab 6
Footer
Layout, branding, contact details and widget columns.
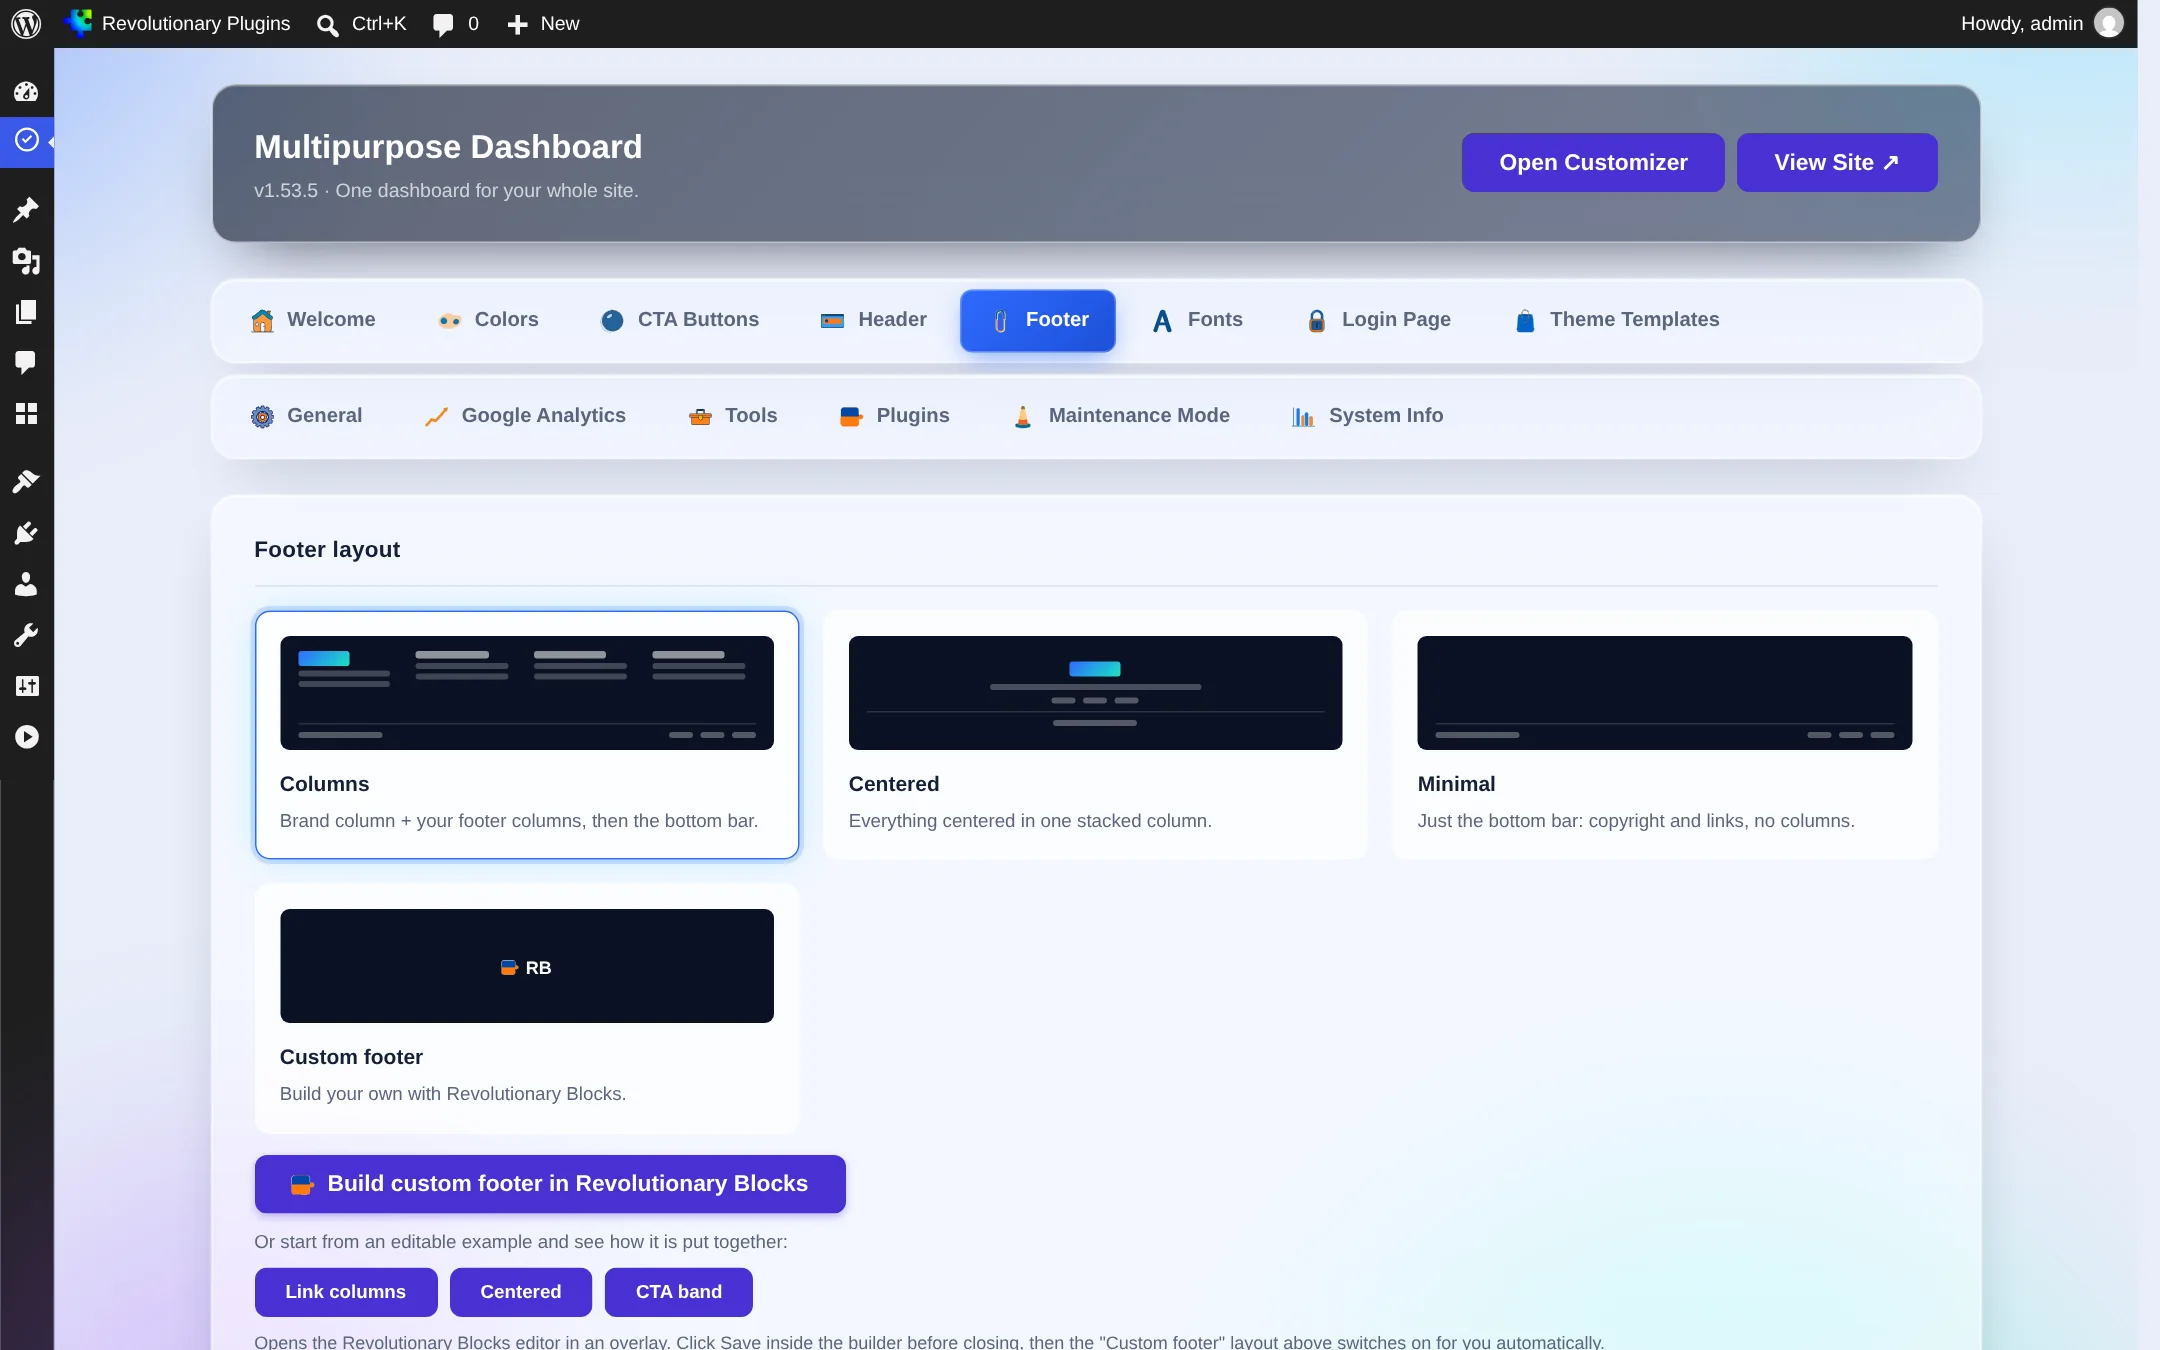
- Layout: Columns (brand column, your columns, then the bottom bar), Centered, Minimal (just the bottom bar), or Custom footer built in Revolutionary Blocks.
- Branding: footer logo, logo size, a separate logo height for phones, alignment and background color.
- Contact details: address, phone, email and opening hours.
- Footer text: tagline, copyright text (use {company} for your company name) and bottom links.
- Brand column widgets.
- Footer columns: one to six, each with a title and widgets you can add right on the tab.
Tab 7
Fonts and performance
Your own fonts, heading sizes, and three switches that make pages load faster.
Custom fonts
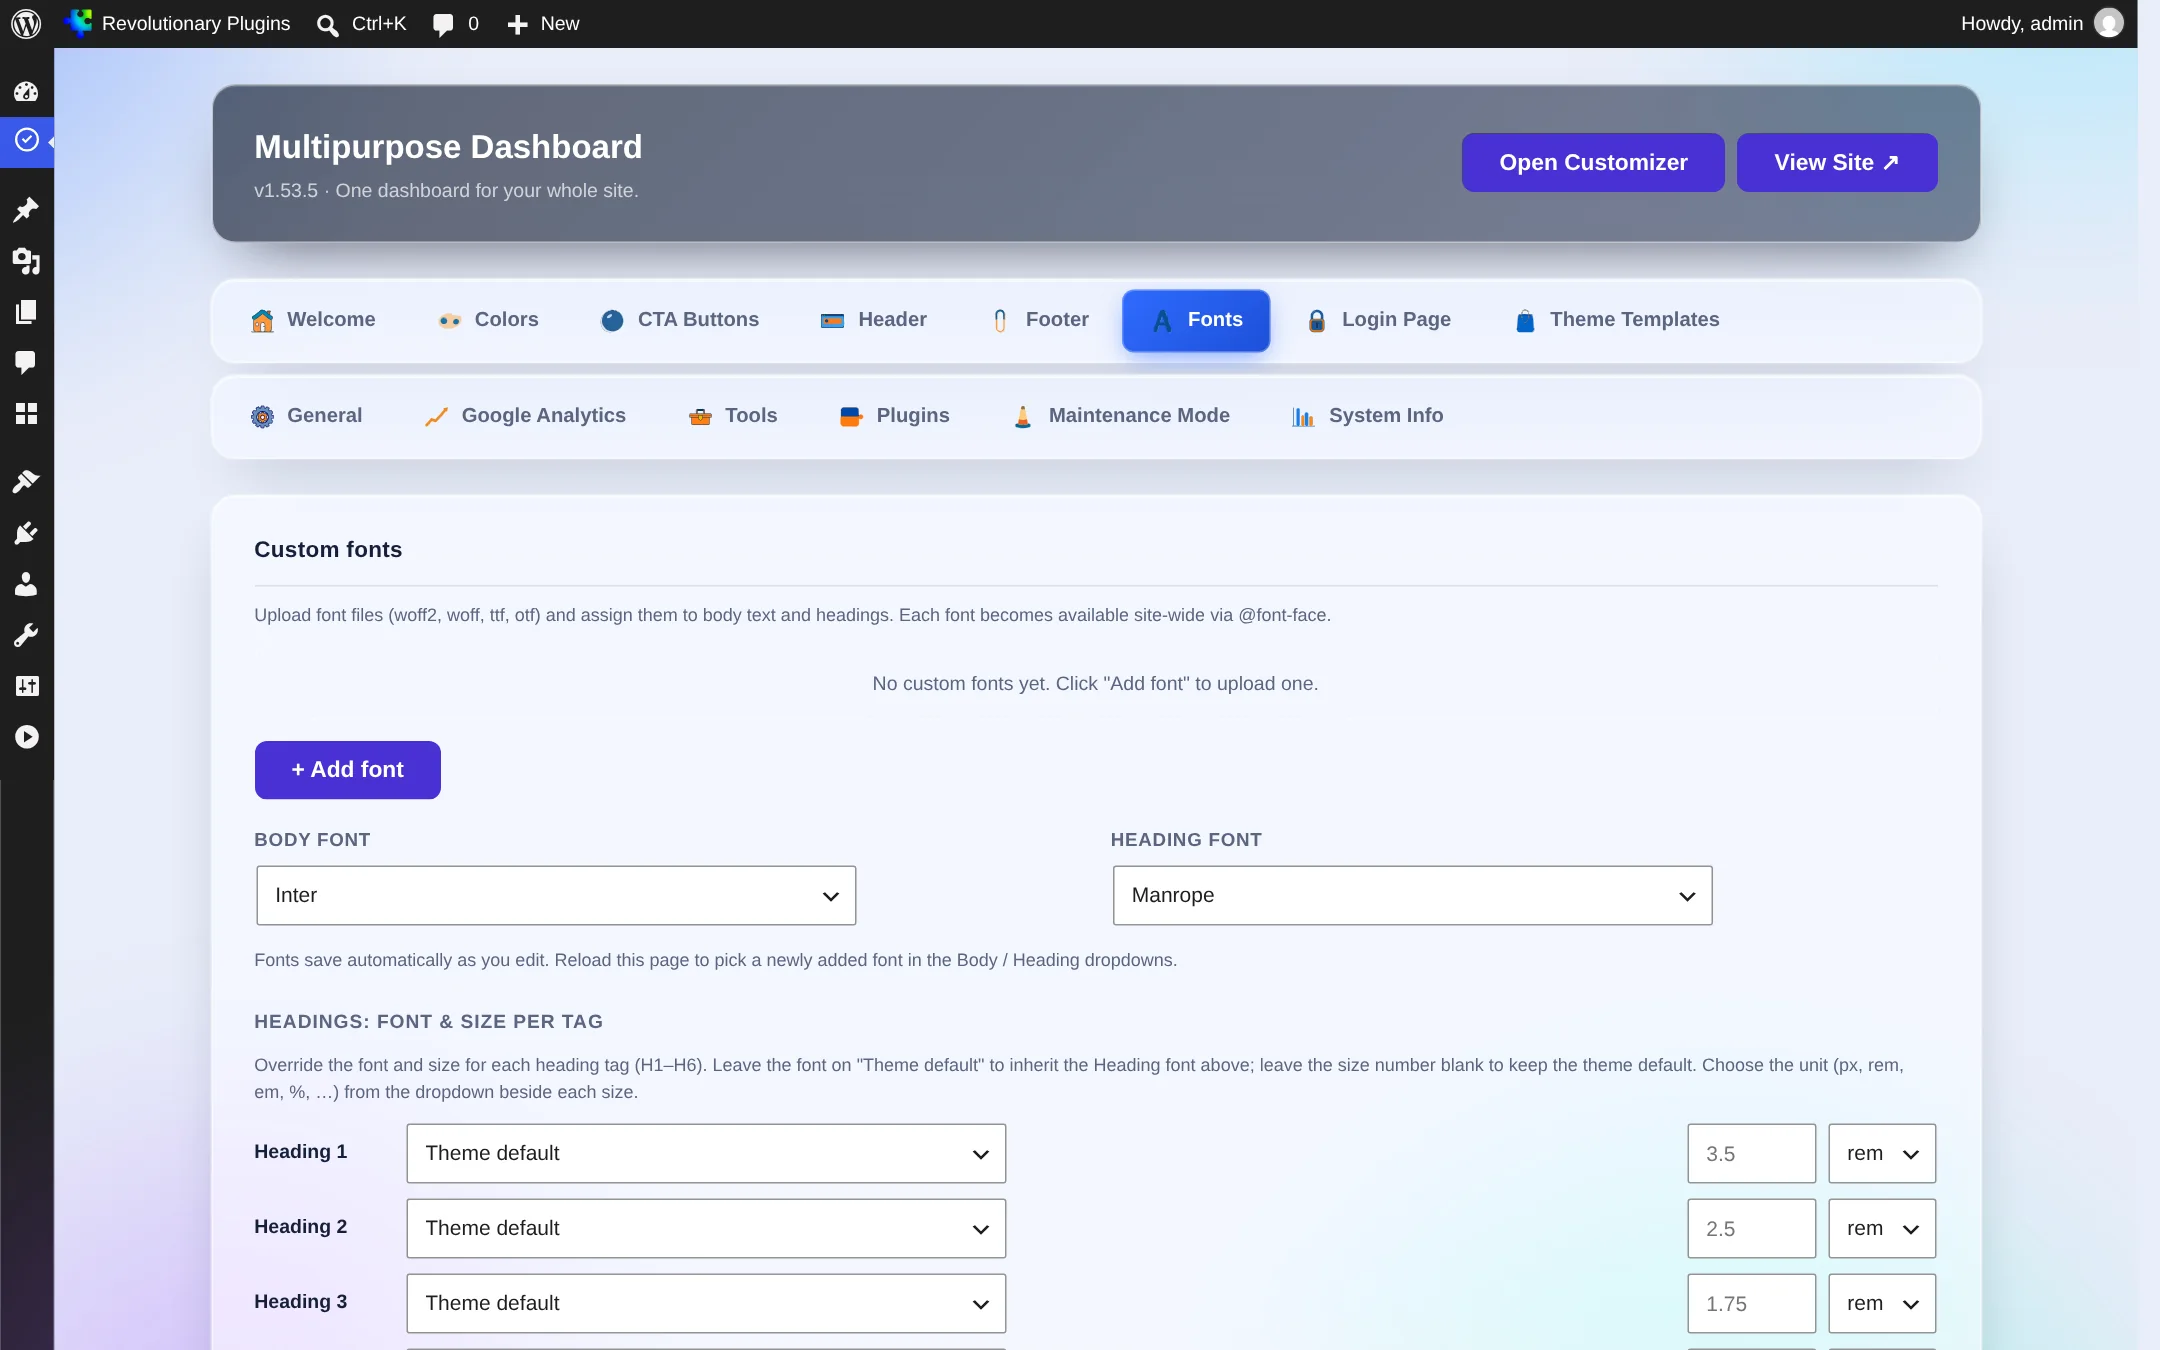
Click Add font, upload a woff2, woff, ttf or otf file, and set its family name, weight and style. Then choose the body font and heading font. Under Headings, override the font and size for each tag from H1 to H6, in the unit you prefer.
Performance
| Switch | Default | What it does |
|---|---|---|
| Serve Google Fonts locally | Off | Downloads the Google Fonts the site uses and serves them from your uploads folder. If a download fails, Google is used. |
| Serve icon font locally | Off | Serves Font Awesome from your site instead of the CDN, falling back to the CDN if a file is missing. |
| Load scripts in the footer | Off | Moves jQuery to the footer and defers the theme script so nothing blocks the first paint. |
Tab 8
Login Page
Design the WordPress login screen at wp-login.php.
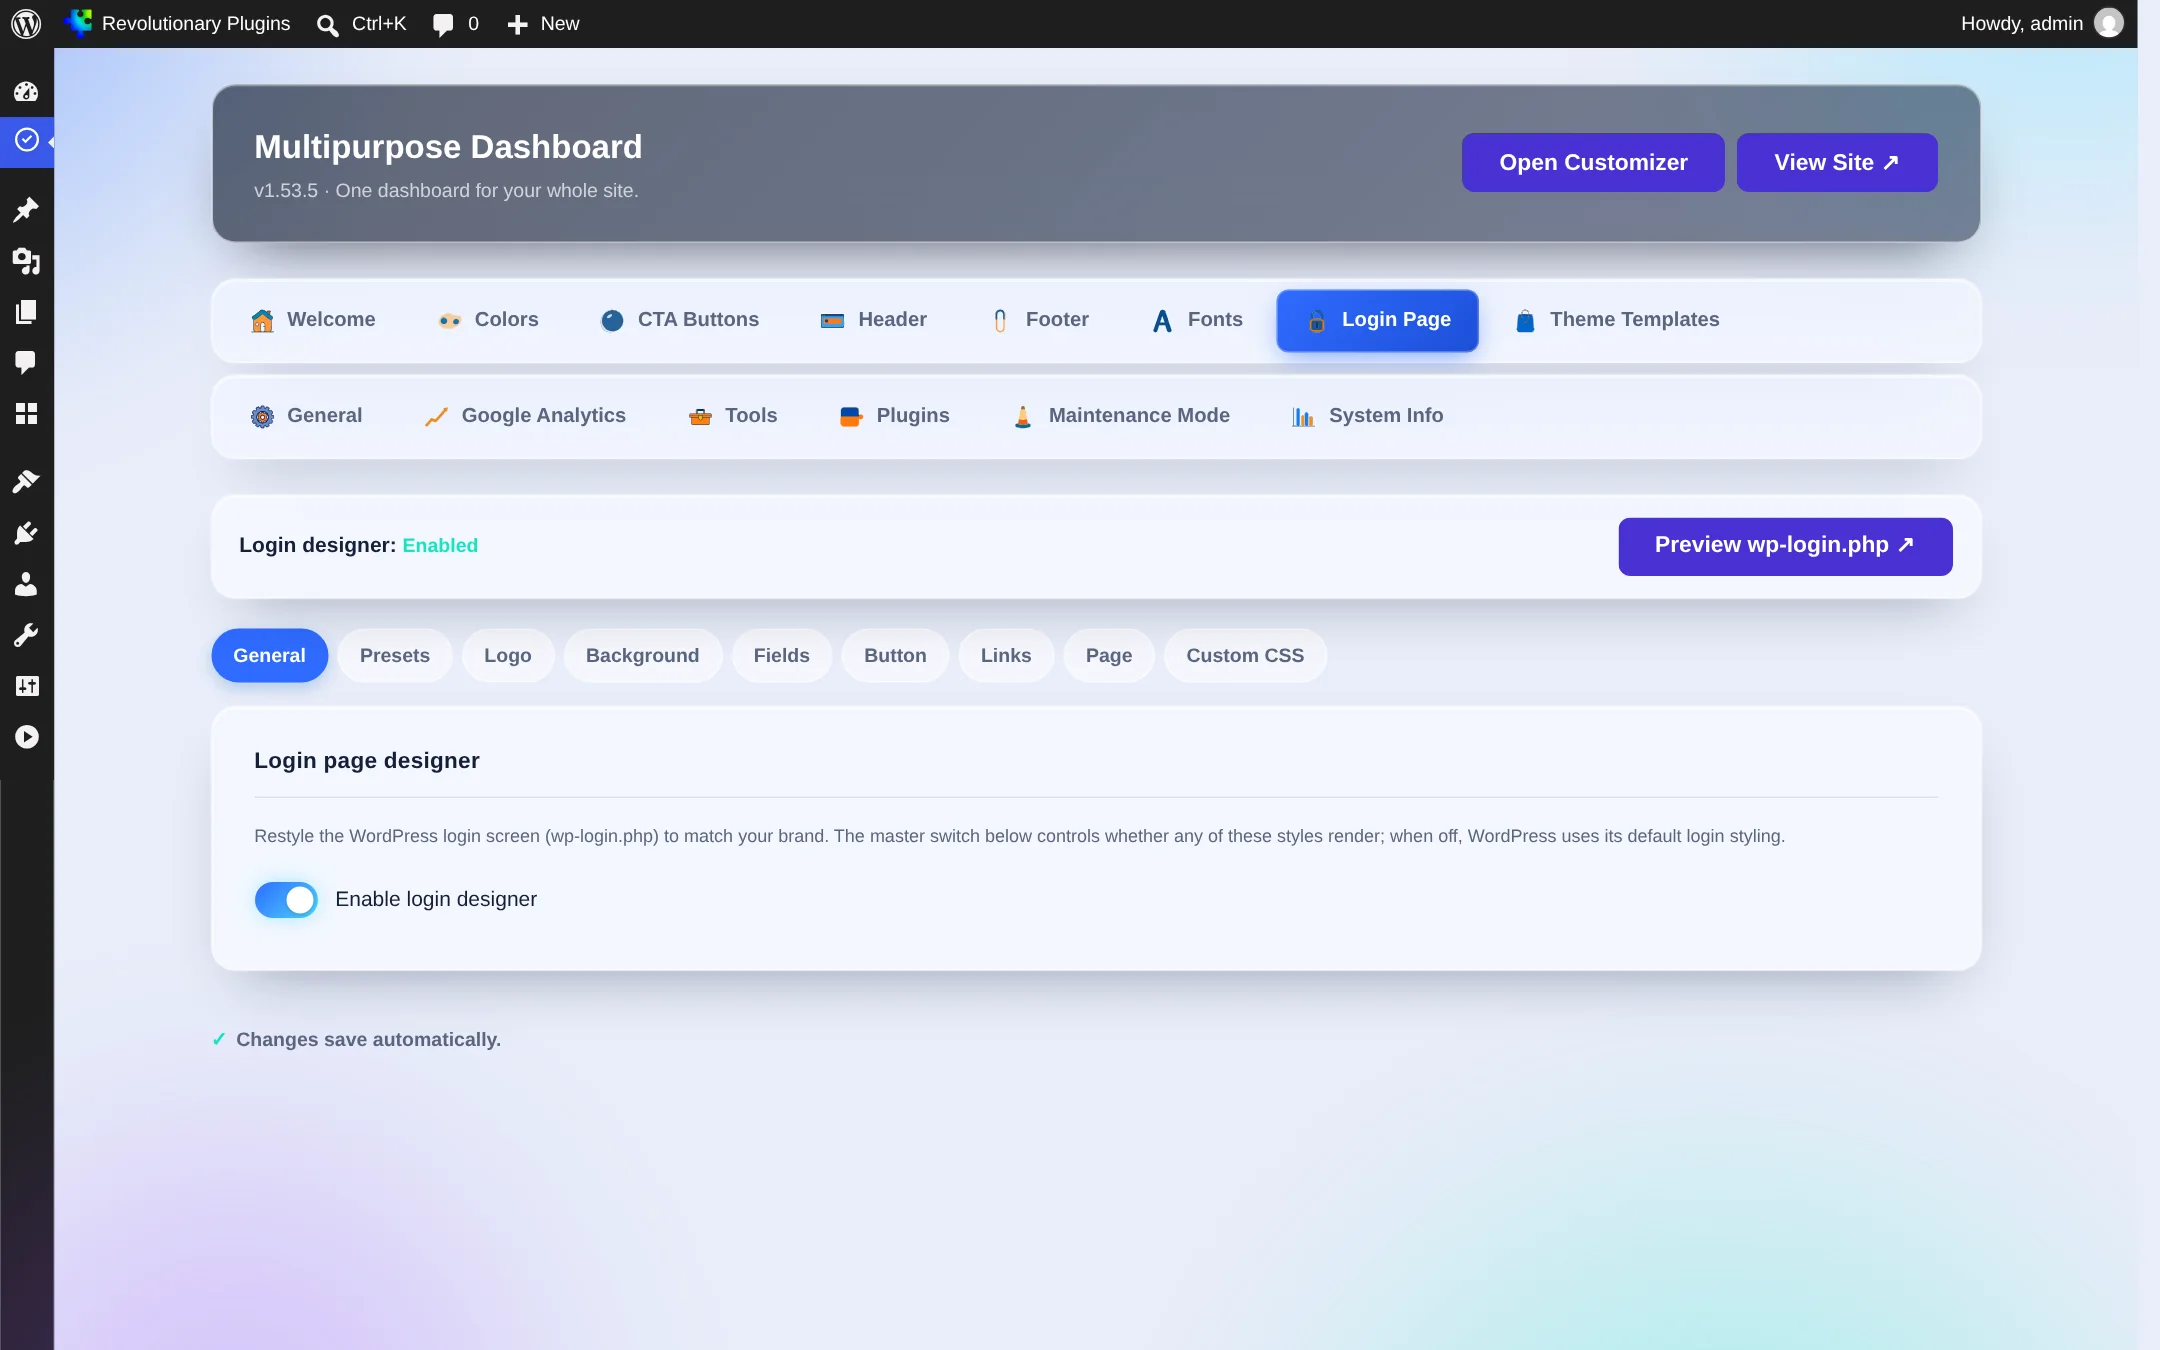
Presets
Start from Default, Dark, Glassmorphic, Brand Blue, Sunset, Forest, Midnight or Minimal, then adjust any part of it.
- Logo.
- Background.
- Form fields.
- Submit button.
- Helper links.
- Page elements.
- Custom CSS.
Revolutionary Blocks login page
Turn on Use the custom Revolutionary Blocks login page to design a full-screen backdrop behind the login form in Revolutionary Blocks.
Tab 9
Theme Templates
Install a complete, styled site from one of 95 kits.
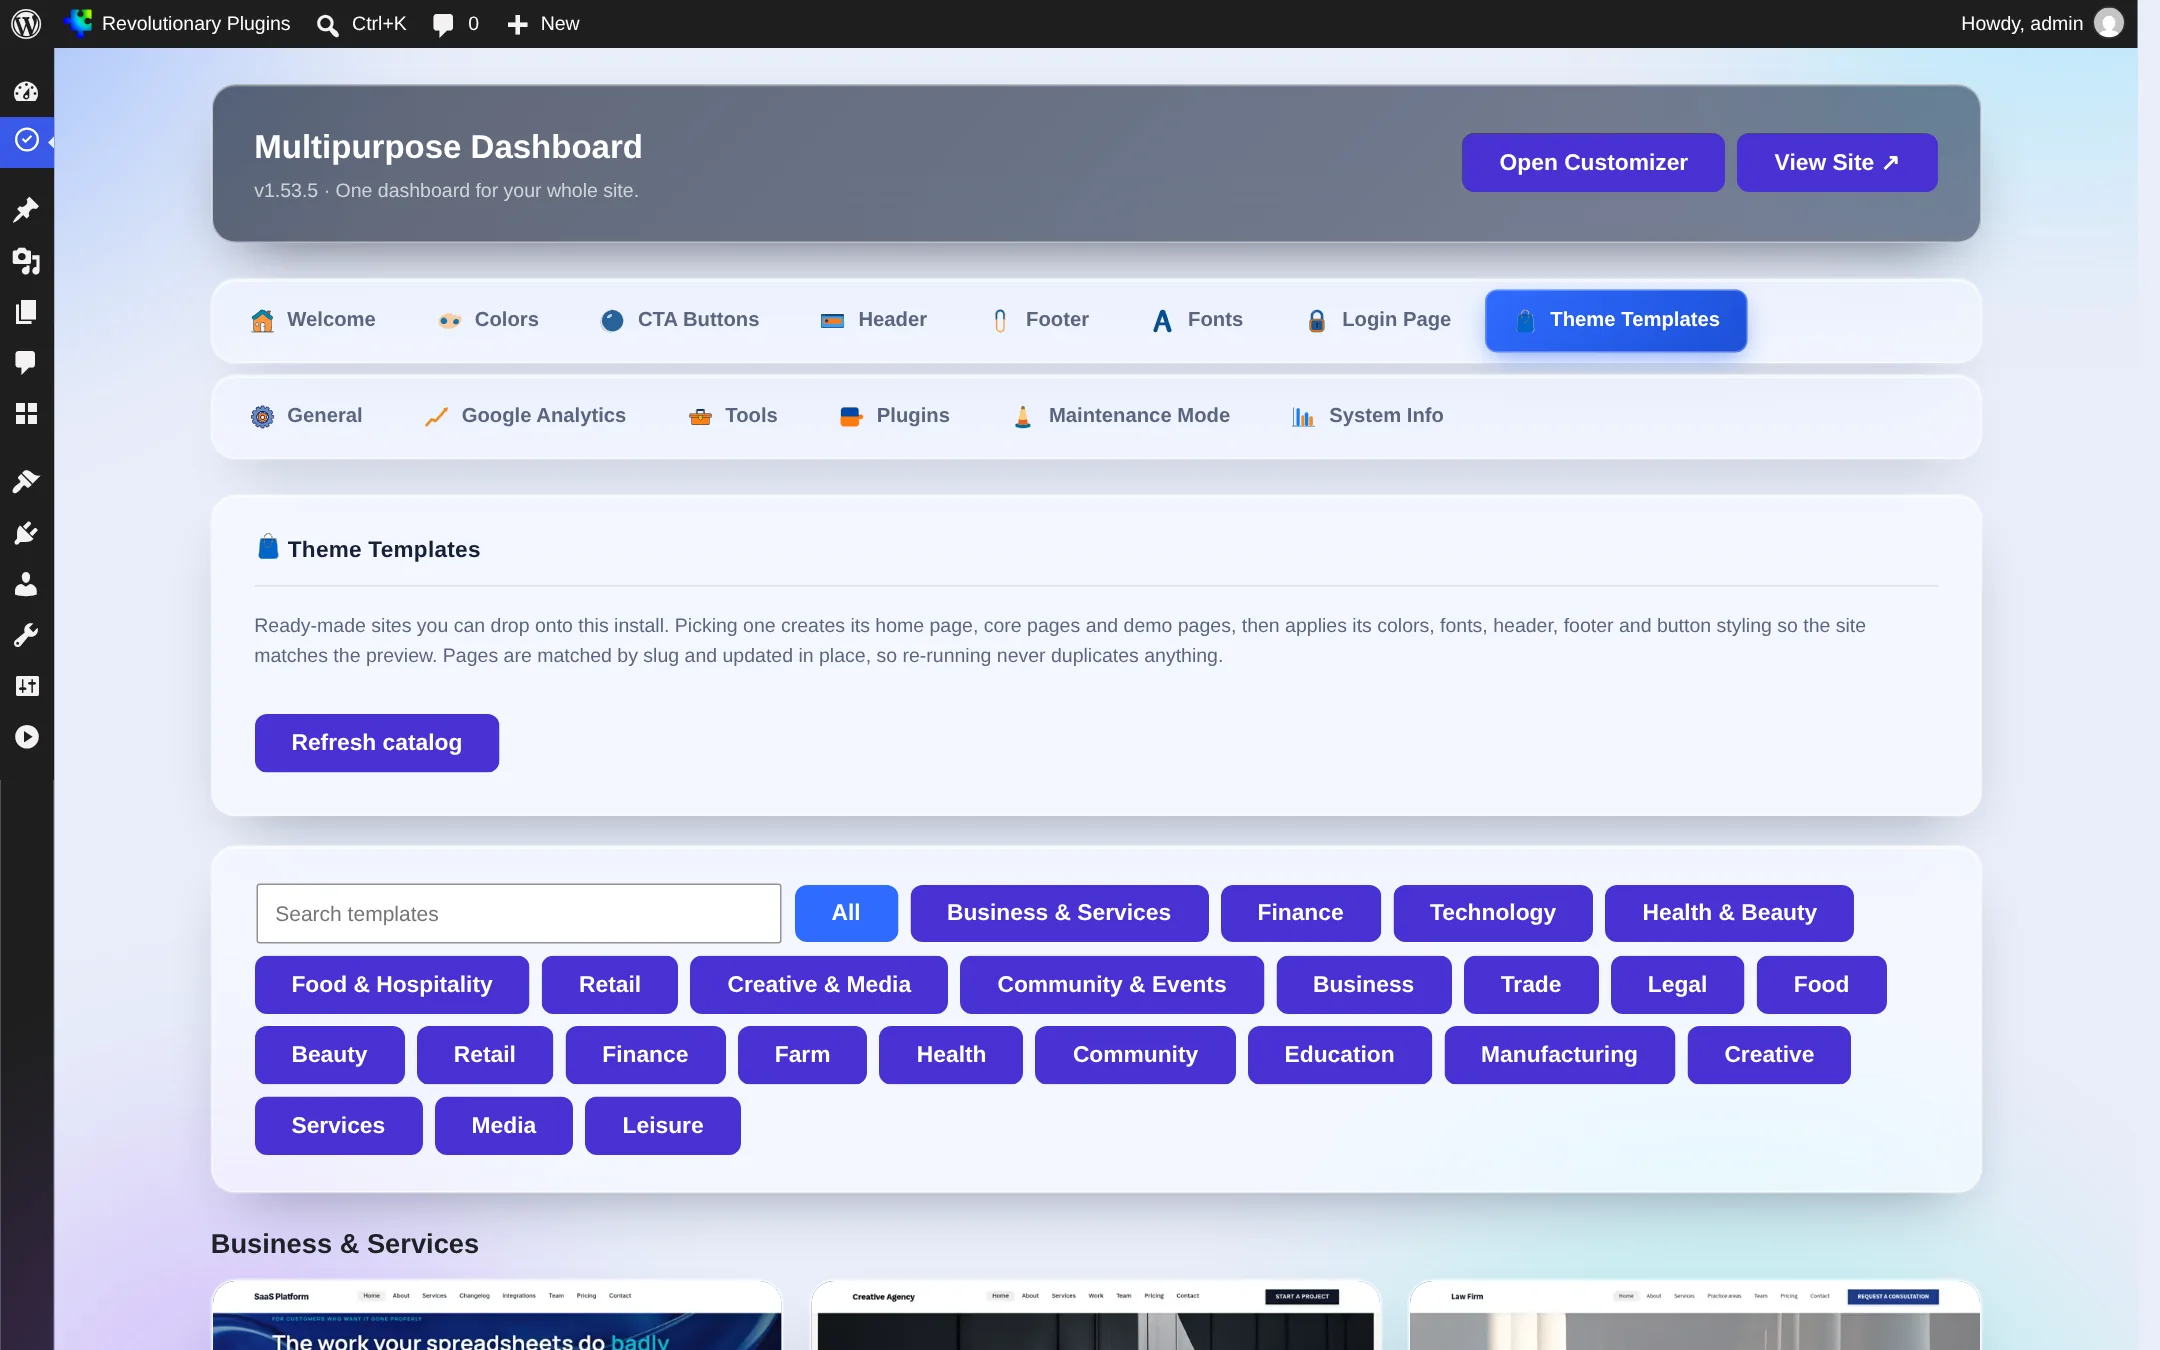
Finding a template
Filter by group with the chips at the top, or search by name. Each kit has a live preview site you can open before installing. Refresh catalog fetches the latest list, and the Installed line shows which template is active and when it was applied.
| Group | Templates |
|---|---|
| Business and Services | 18 |
| Finance | 4 |
| Technology | 1 |
| Health and Beauty | 12 |
| Food and Hospitality | 11 |
| Farms and Agriculture | 6 |
| Manufacturing and Industrial | 5 |
| Retail | 5 |
| Creative and Media | 7 |
| Community and Events | 11 |
| Lifestyle and Leisure | 4 |
| Trades and Home Services | 11 |
What Install does
- Installs and activates the plugins the kit needs (Revolutionary Blocks always, and Forms, eCommerce, SEO and others where the kit uses them).
- Applies security defaults and turns on automatic updates.
- Creates the home, core and demo pages as Revolutionary Blocks documents.
- Downloads the template images into your Media Library.
- Switches plain permalinks to pretty ones if needed.
- Builds the primary menu, only if that menu location is empty.
- Seeds a contact form and demo products where the kit uses them.
- Applies the kit's colors, fonts, buttons, header, footer, top bar and color mode.
Tab 10
Google Analytics
Connect Google Analytics 4, Search Console and PageSpeed Insights, and read the reports in wp-admin.
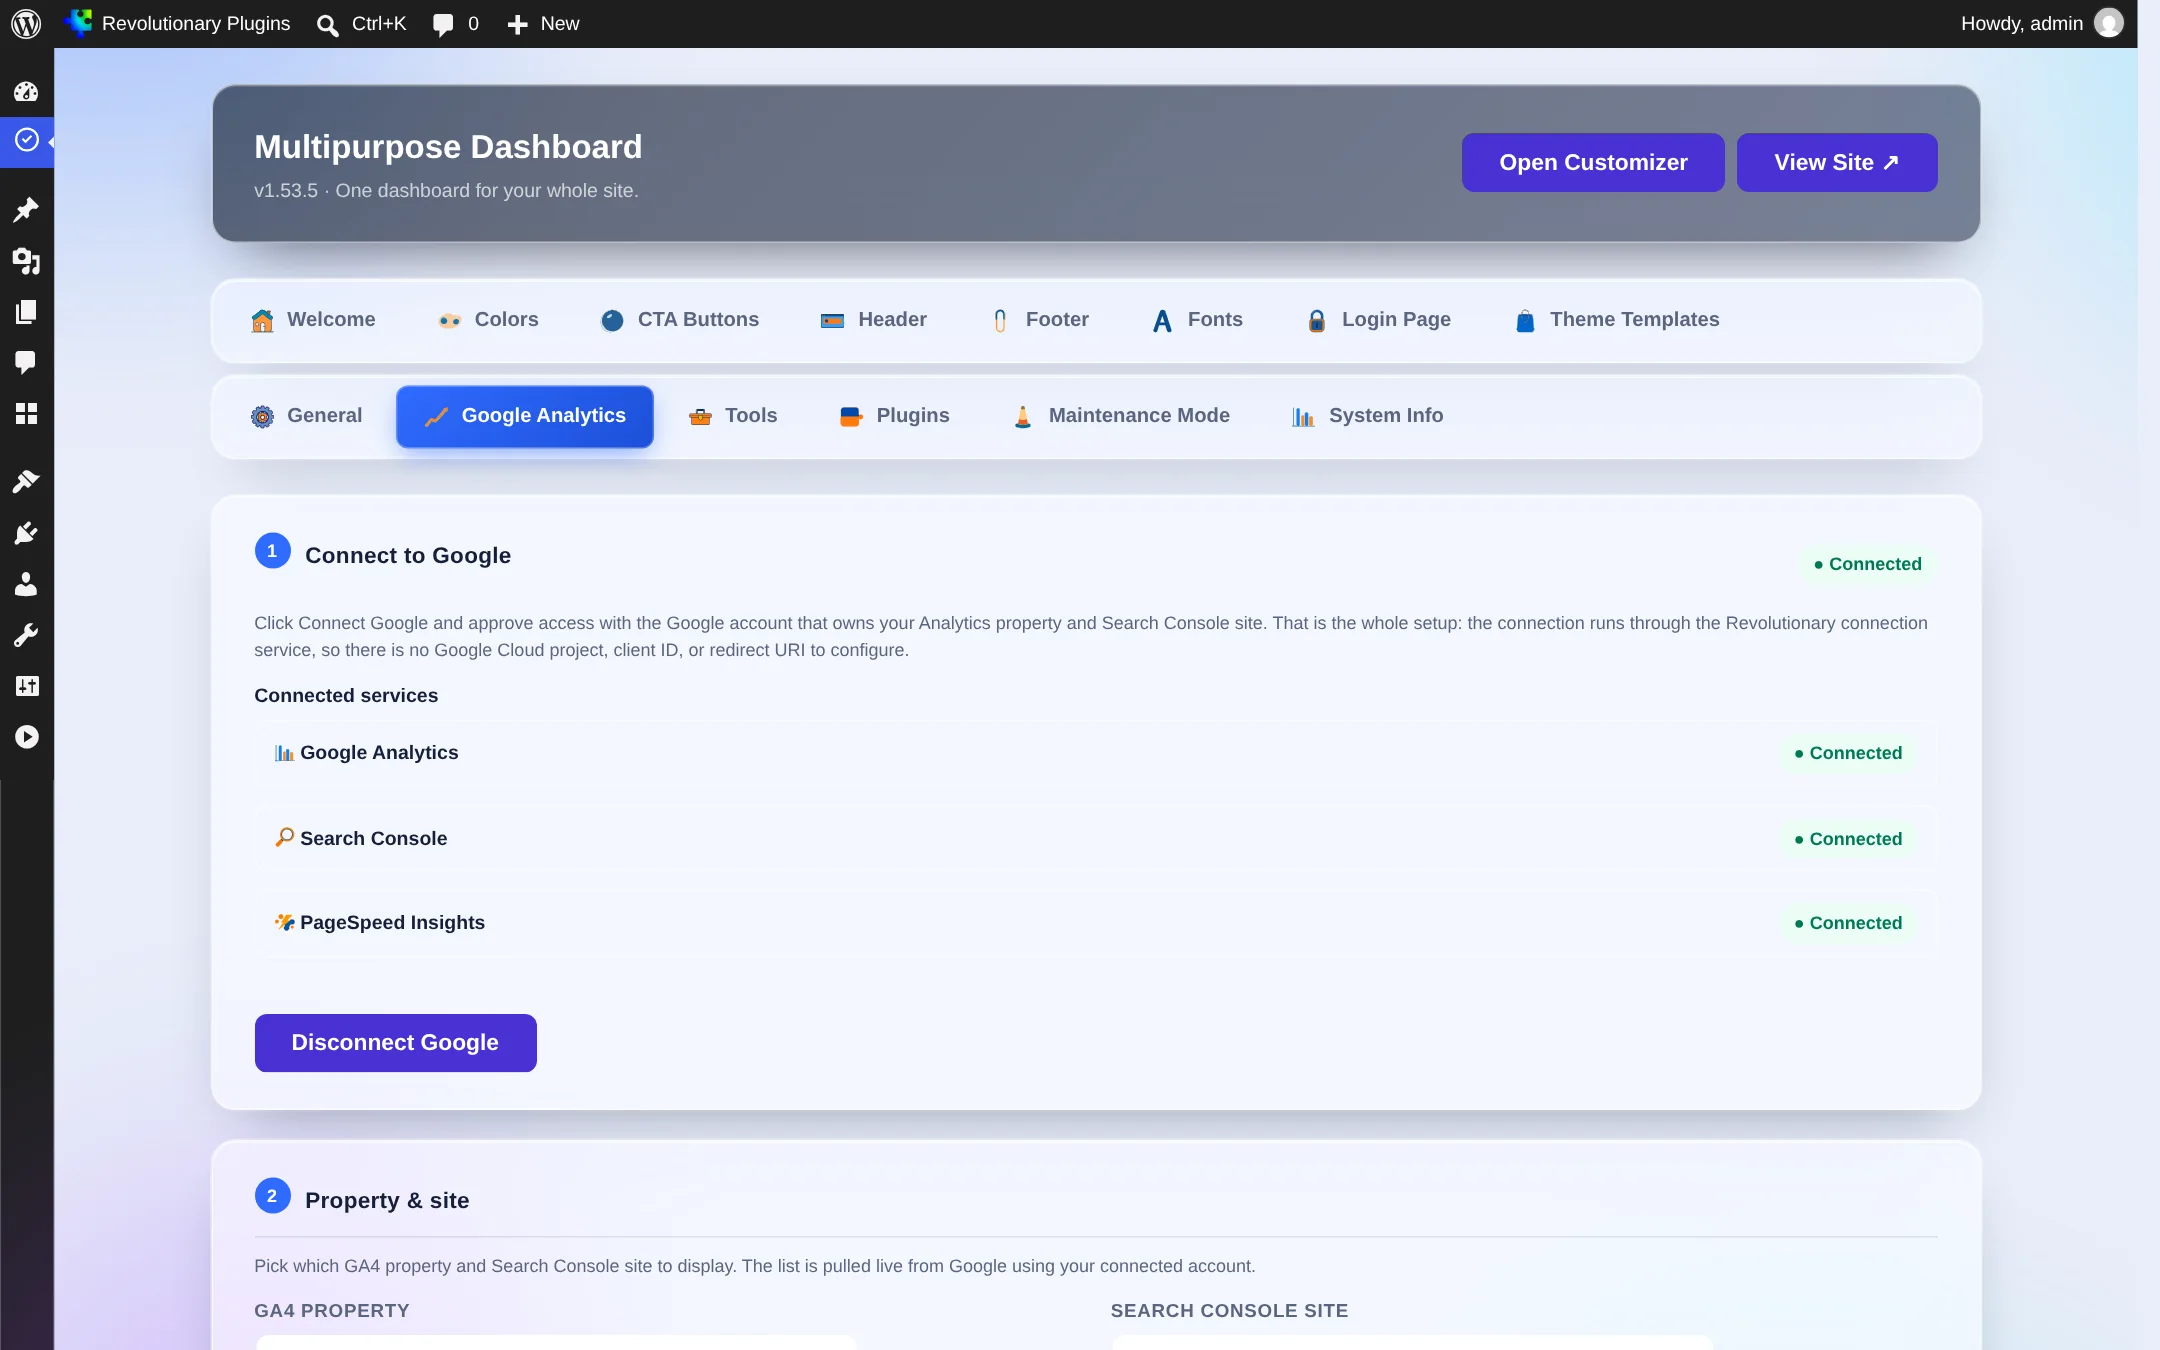
- 1. Click Connect to Google and sign in with the account that owns your Analytics property.
- 2. Approve access. The connection goes through our sign-in service, so you do not need to create a Google Cloud project.
- 3. Choose your Analytics property and Search Console site.
- 4. Check that each service shows Connected.
On-site tag
Add your GA4 measurement ID to put the Analytics tag on the site. Anonymize visitor IP addresses and excluding logged-in administrators are both on by default.
Reports
- Visitors over time.
- Traffic sources, devices, top pages and top countries.
- Search Console: top search queries and top search pages.
- PageSpeed Insights scores.
If Google expires or revokes access, or a permission is missing, the tab says so and offers Reconnect. Disconnect Google removes the connection.
RankFlow
If you use RankFlow to manage several sites, turn on Connect this site to RankFlow and paste the pairing secret from the site's page in RankFlow.
Tab 11
Tools
Quick jobs and shortcuts.
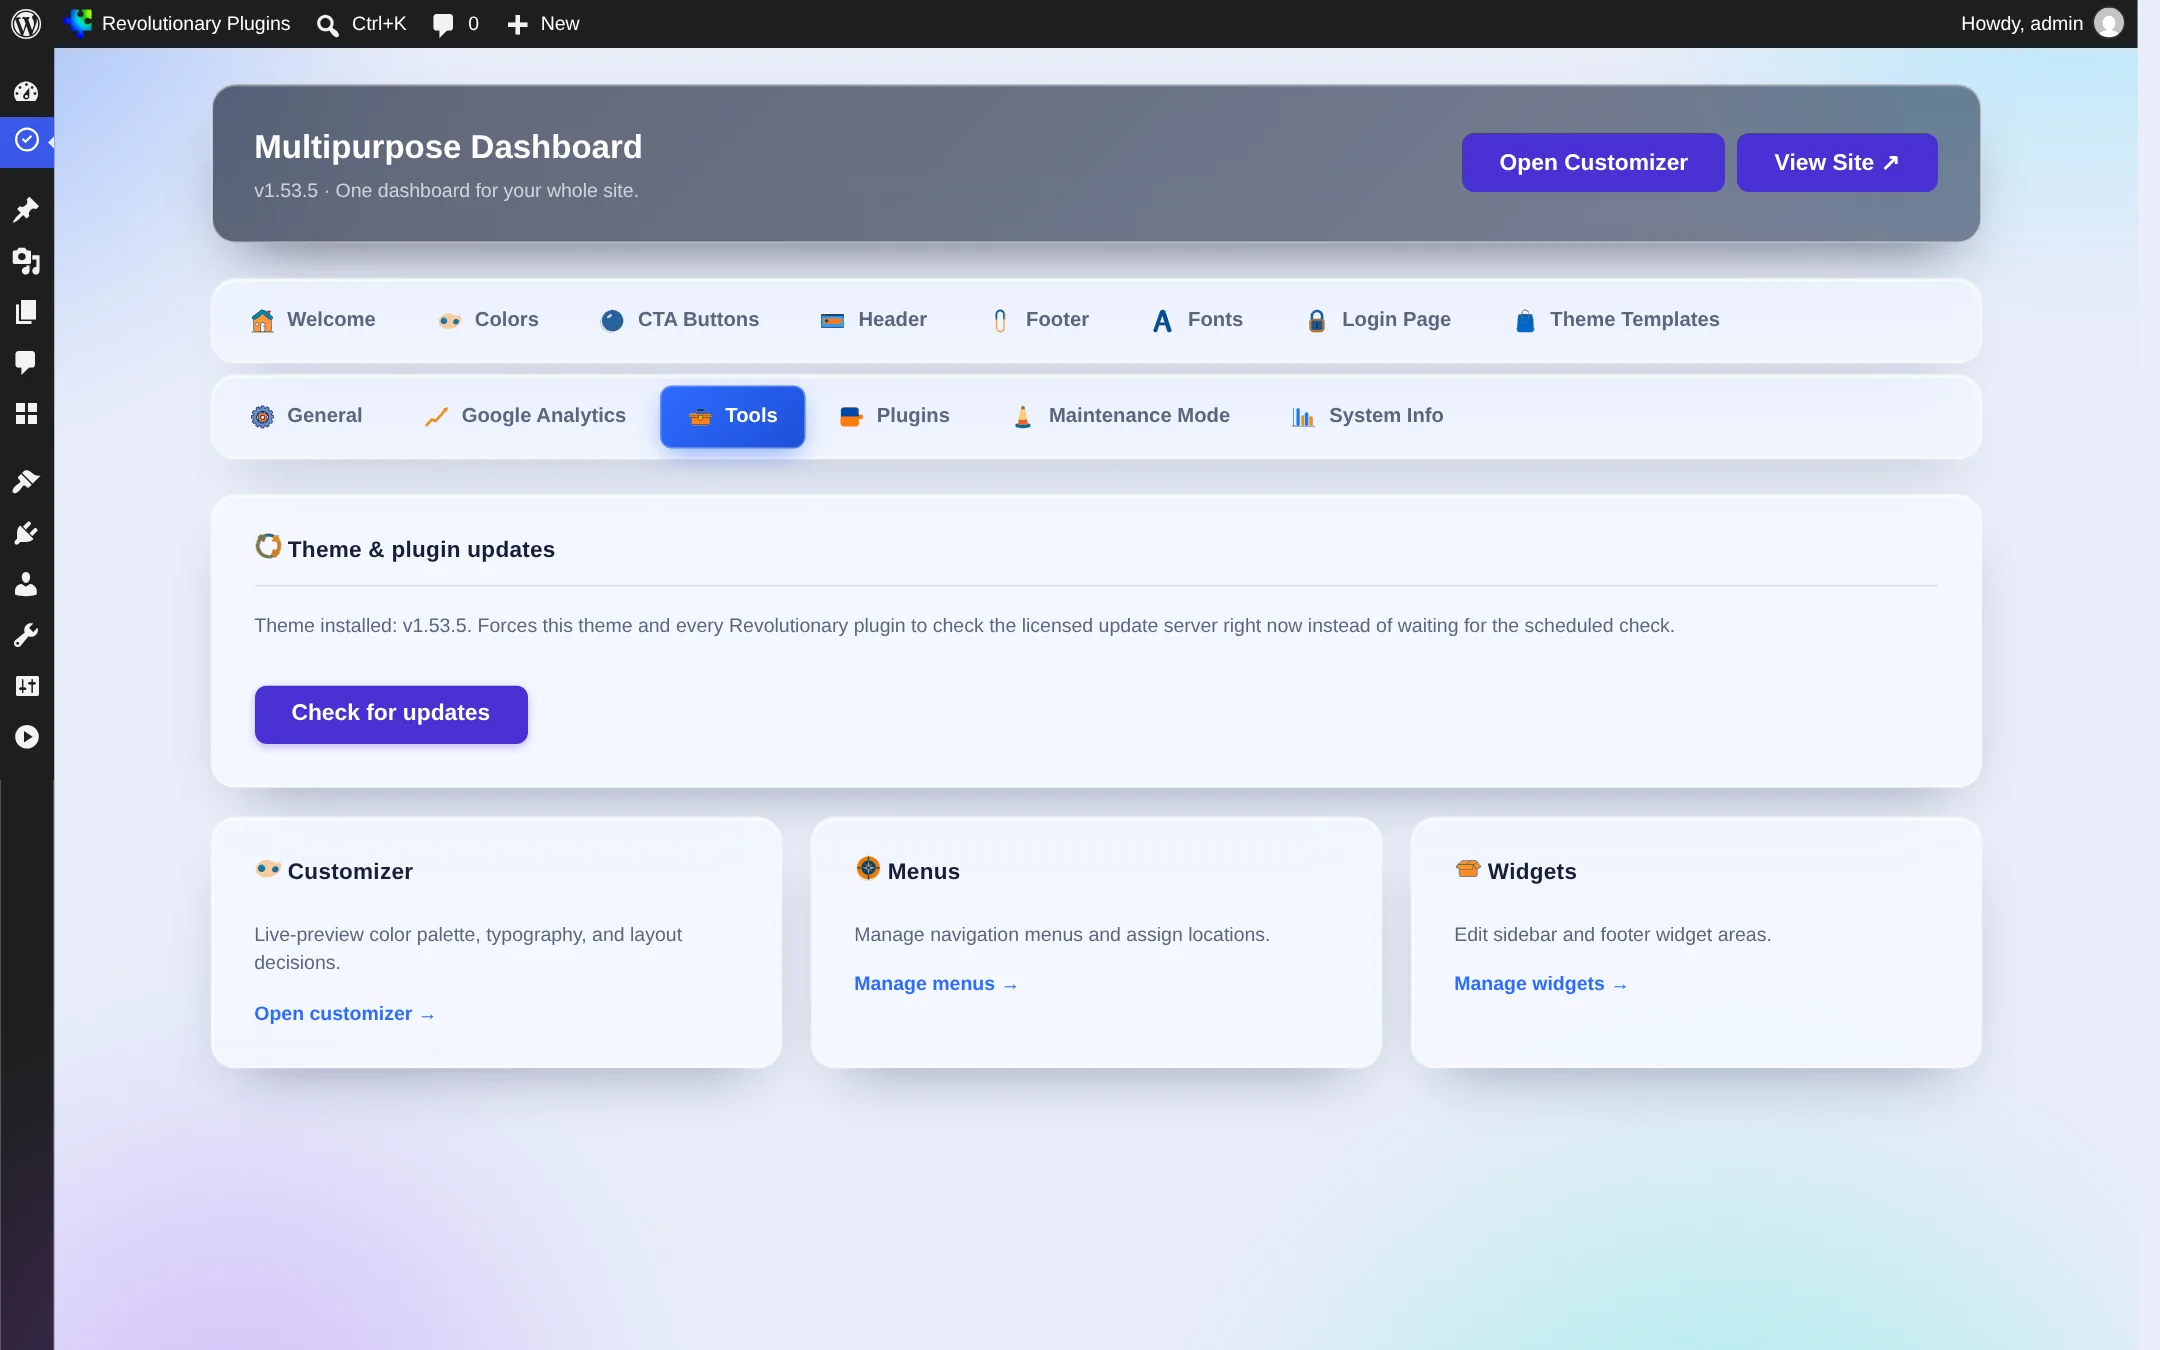
- Check for updates makes the theme and every Revolutionary plugin check the update server right now, instead of waiting for the scheduled check.
- Shortcuts to the Customizer, Menus and Widgets.
Tab 12
Plugins
Install any Revolutionary plugin with your license.
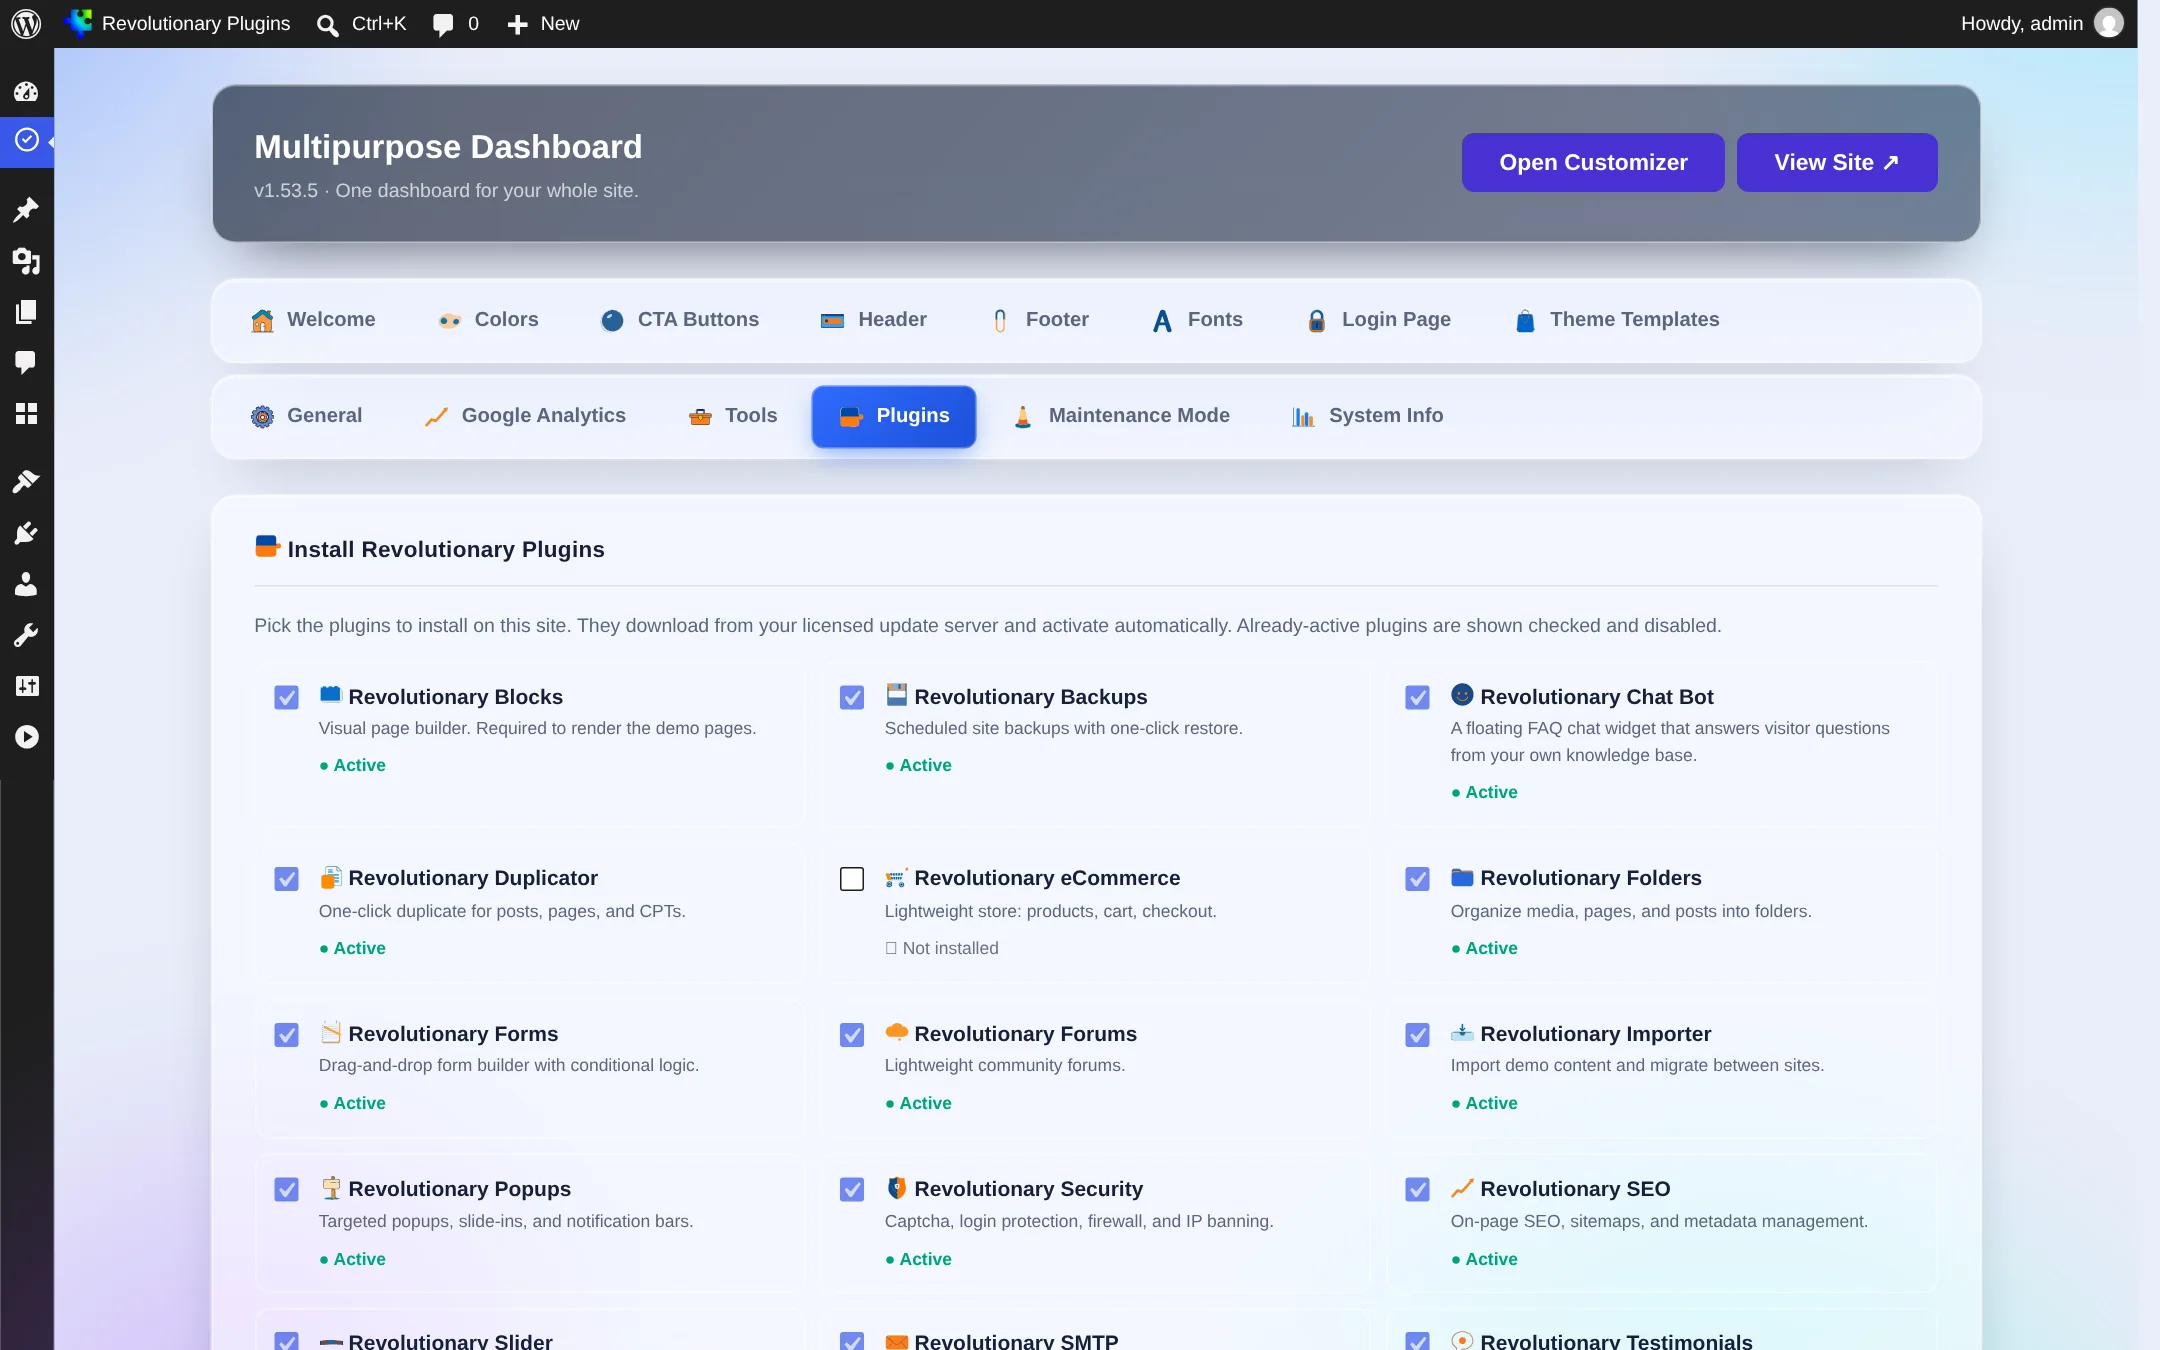
- 1. Tick the plugins you want. Active plugins are already ticked and cannot be changed here.
- 2. Or click Select all not-installed.
- 3. Click Install selected. Each plugin downloads from the licensed update server and activates.
Available: Blocks (required for templates), Backups, Chat Bot, Duplicator, eCommerce, Folders, Forms, Forums, Importer, Popups, Security, SEO, Slider, SMTP, Testimonials and Ticketing.
Tab 13
Maintenance Mode
Show visitors a styled maintenance page while you work. Administrators and the login page stay reachable.
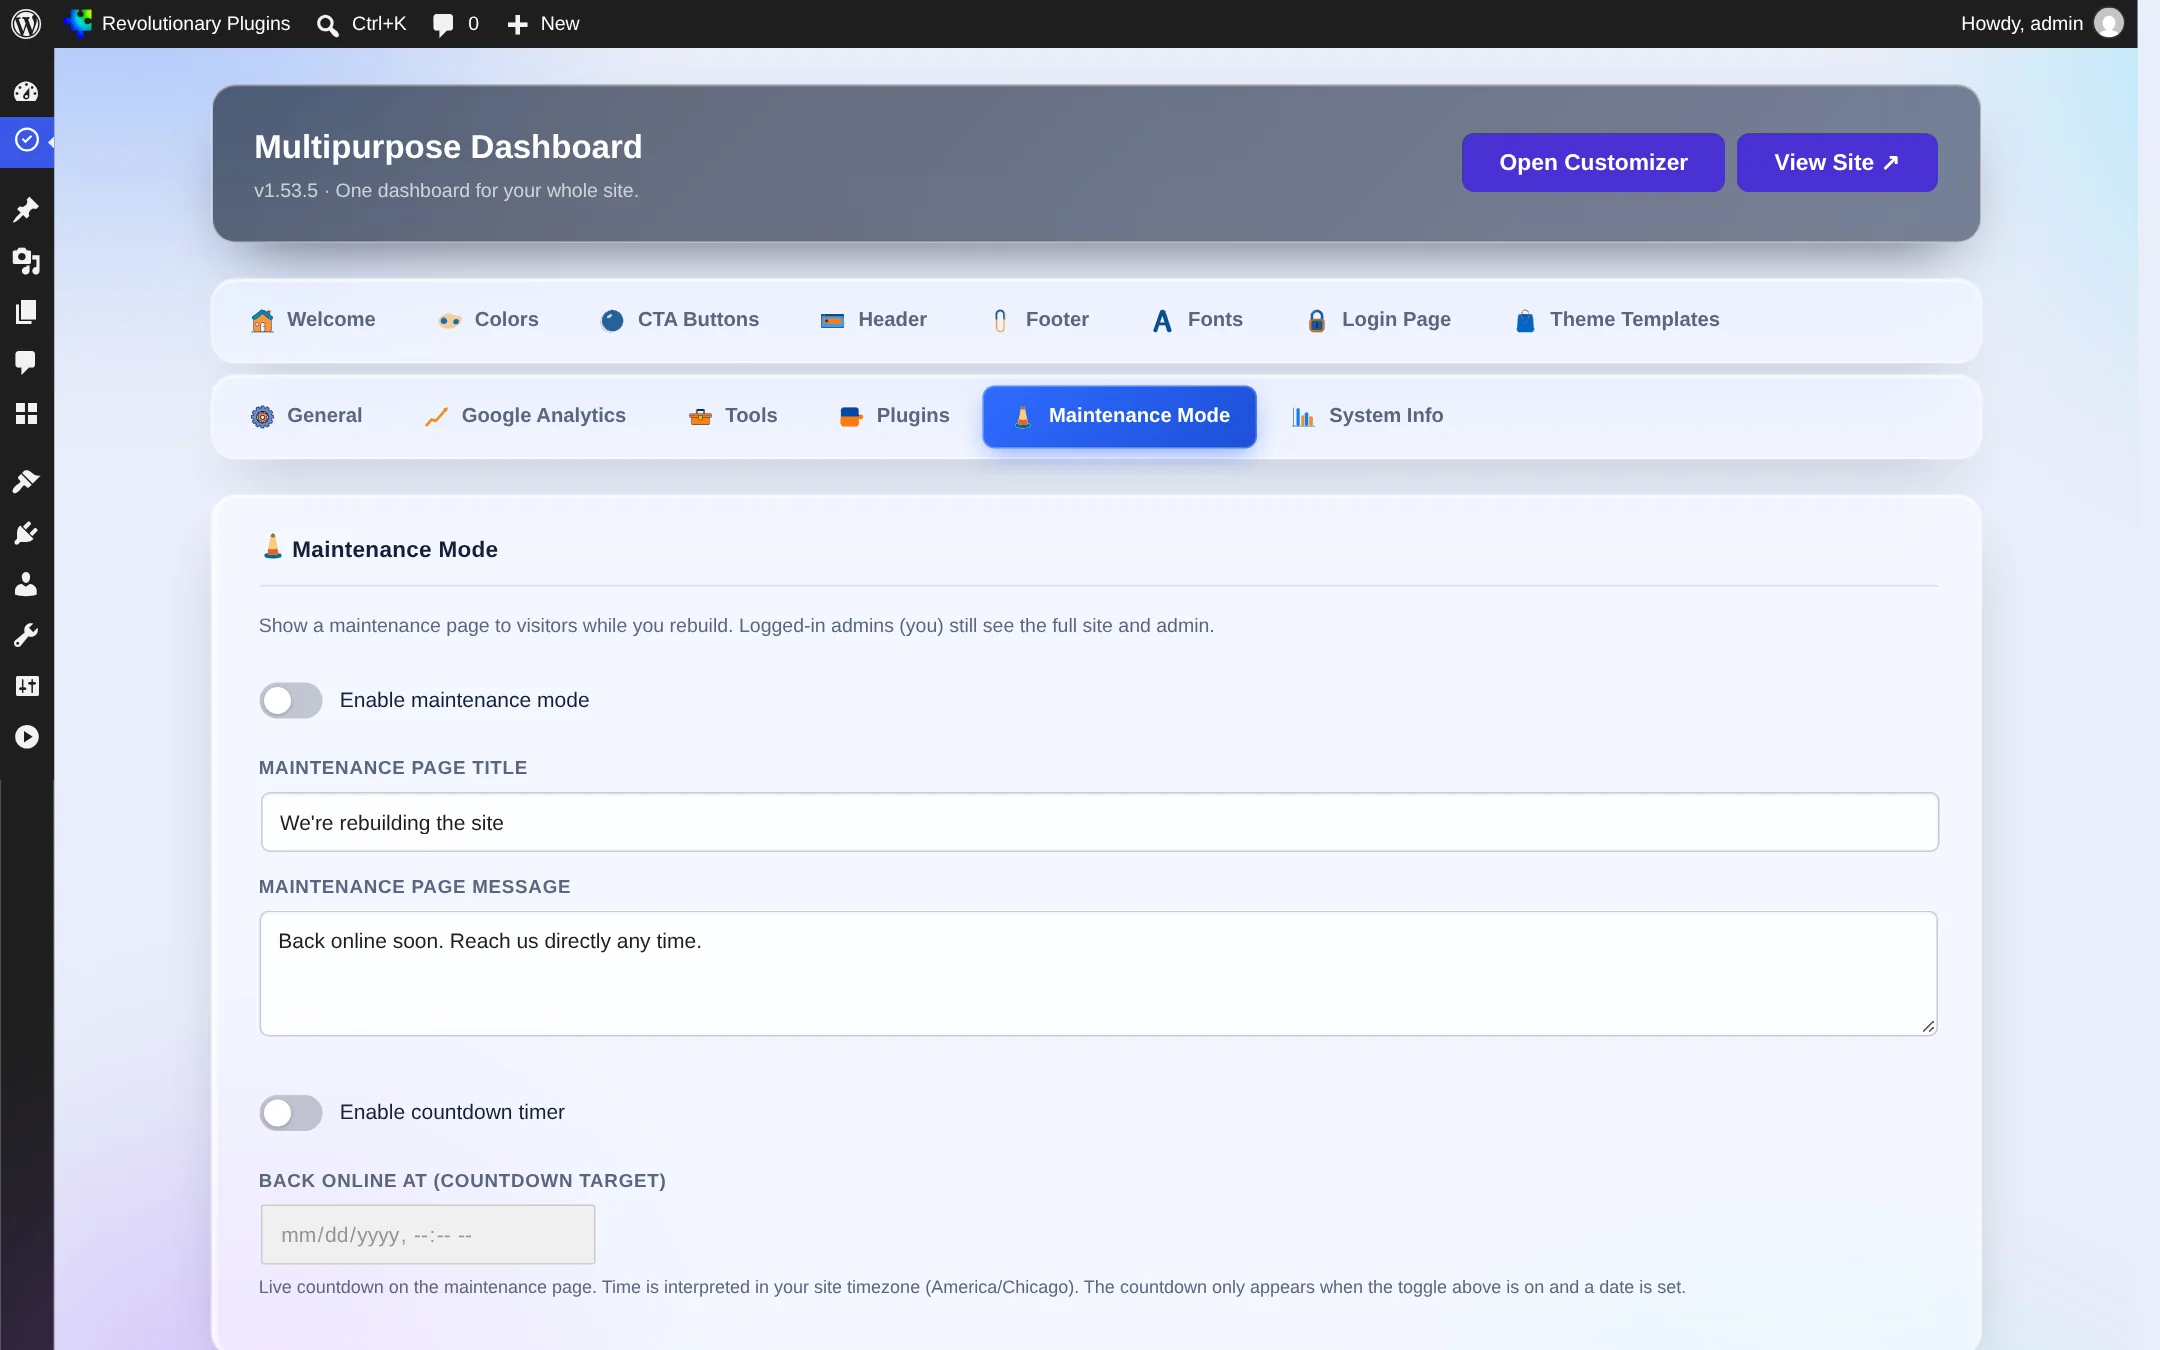
- Enable maintenance mode to switch it on.
- Choose from 41 content templates and 63 backgrounds, or use your own image.
- Add your logo and contact details.
- Turn on the countdown timer to show when the site returns.
Tab 14
System Info
Everything support needs to know about your site, on one screen.
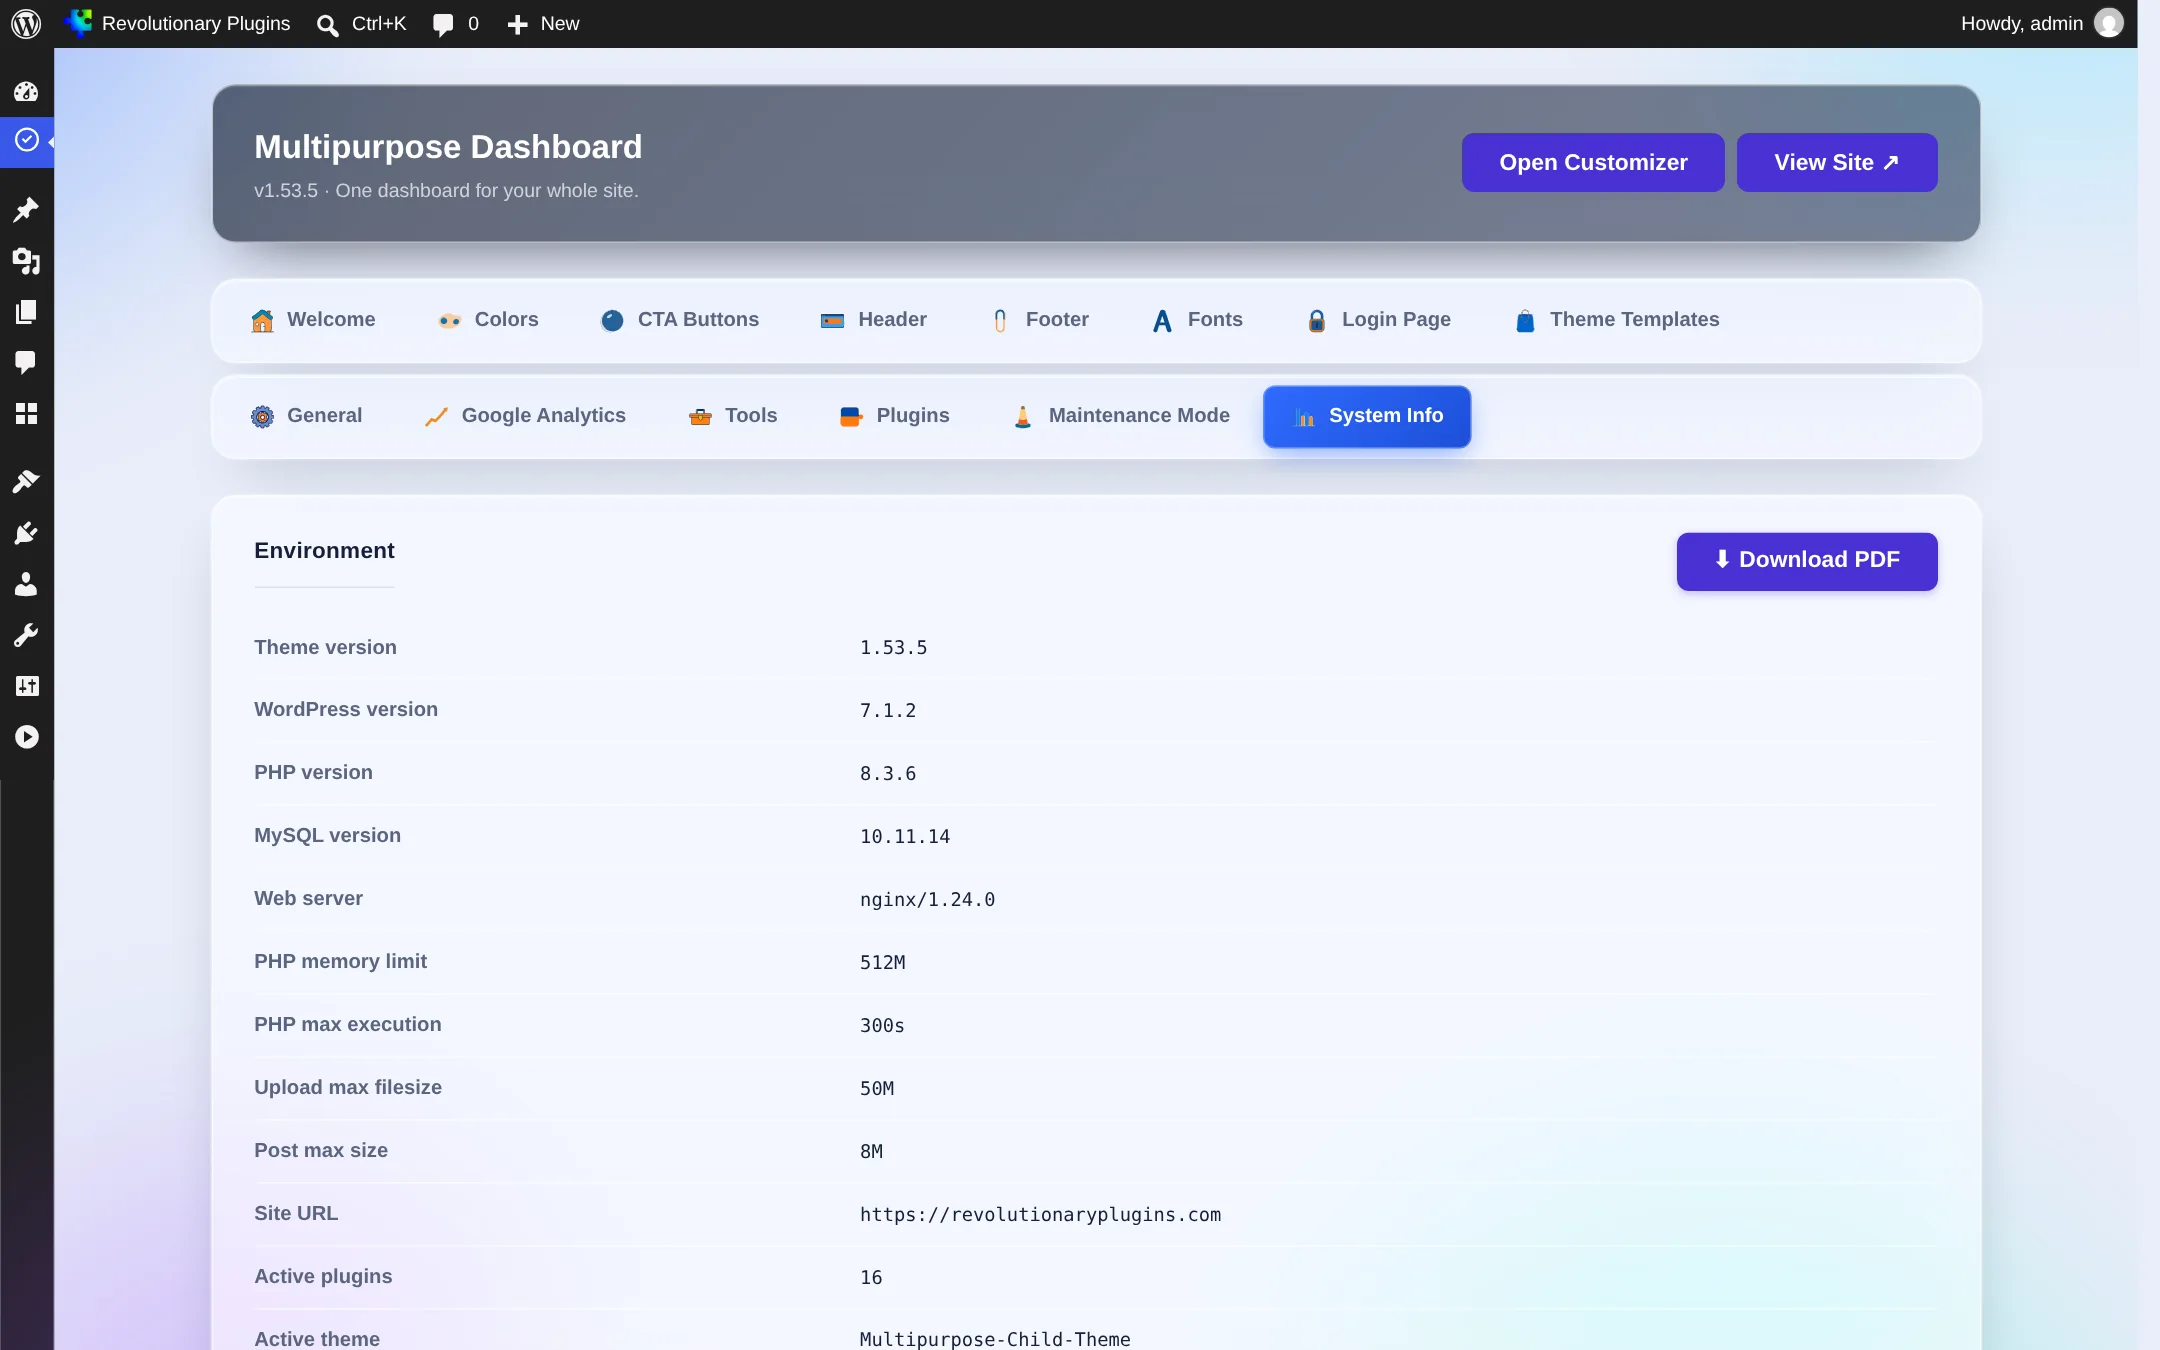
Shows the theme and child theme, WordPress, PHP and MySQL versions, the web server, PHP limits, the site URL, active plugins and whether debug mode is on. Click the download button to save it as a PDF for a support ticket.
Reference
Widgets, menus and page templates
What the theme adds to WordPress's own Menus and Widgets screens and the page editor. There are no WP-CLI commands.
| Type | What the theme provides |
|---|---|
| Menu locations | Primary, Header Center, Header Right, Header Top bar, and one per footer column |
| Widget areas | Blog Sidebar, Header, Footer Brand Column, and Footer Column 1 onward |
| Widgets | Contact Info (address, phone, email, hours) and Social links |
| Page templates | Full Width (No Sidebar) and Inner Page (Light Header) |
| Shortcode | [revdash_color_mode_toggle] places the light and dark toggle |
Customizer
A small Theme Options panel covers the hero badge, title and subtitle, brand colors, and the header phone and CTA. Everything else is on the dashboard.
Troubleshooting
Common questions
Revolutionary Blocks is not active. Install and activate it from the Plugins tab, then view the pages again.
Saving it needs the unfiltered HTML capability. Multisite admins and sites that set DISALLOW_UNFILTERED_HTML cannot change it.
Maintenance mode is probably on, so Google sees the maintenance page. Turn it off, verify, then turn it back on.
A plugin or embed is printing inline jQuery code. Turn the switch off on the Fonts tab.
In the child theme, which the theme installs for you, or in the Custom CSS field on the General tab for styles.
Stuck on something?
Search the forums, open a ticket, or write to us. A real person reads every message.