

Documentation · Revolutionary Popups 0.0.15
Revolutionary Popups, every option explained.
How to create a popup, choose its trigger, target the pages it appears on, cap how often visitors see it, embed it with a block or shortcode, and read the stats.
Released version 0.0.13
Current release setup and checks
Show popups, bars and slide-ins with targeting, triggers and frequency limits.
- The opt-in native slide-in layout handles keyboard focus and reduced motion.
- A slide-in suspends while an open Ruby chat panel overlaps it.
Check your setup
- Select the layout and audience rules, then preview the popup on desktop and phone.
- Test dismissal, the frequency cap and the open chat panel with harmless demo content.
Watch the walkthrough
Save a targeted popup as a draft
Create a fictional announcement with Revolutionary Popups, choose a trigger and URL targeting, then save it as a draft. No visitor campaign is published.
Recording release: 0.0.9. Captured on an isolated demonstration site.
Chapters
Quick start
Up and running in minutes
Step 1
Install and activate
Upload the plugin zip under Plugins, Add New, then activate. Find it under Revolutionary Plugins, Popups.
Step 2
Create a popup
Click New popup, give it a name and content, and pick a trigger.
Step 3
Choose where and how often
Set the display rule and frequency cap, then the layout and colors.
Step 4
Publish
Set the status to Published and save. Open your site in a private window to test it.
On this page
Start here
Getting started
Revolutionary Popups needs WordPress 5.8 or later and PHP 7.4 or later. After activation it appears under Revolutionary Plugins, Popups.
License and updates
Updates come from the Revolutionary update server using your site's Revolutionary bundle license. Enter the key once in Multipurpose Dashboard, Welcome and every Revolutionary plugin on the site is covered. Without a license nothing is locked: you see an admin notice and do not receive updates.
Dashboard
The overview
The overview shows the number of published and draft popups, total impressions and total dismissals, a table of your latest popups, and quick actions for a new popup, the popup list and settings.
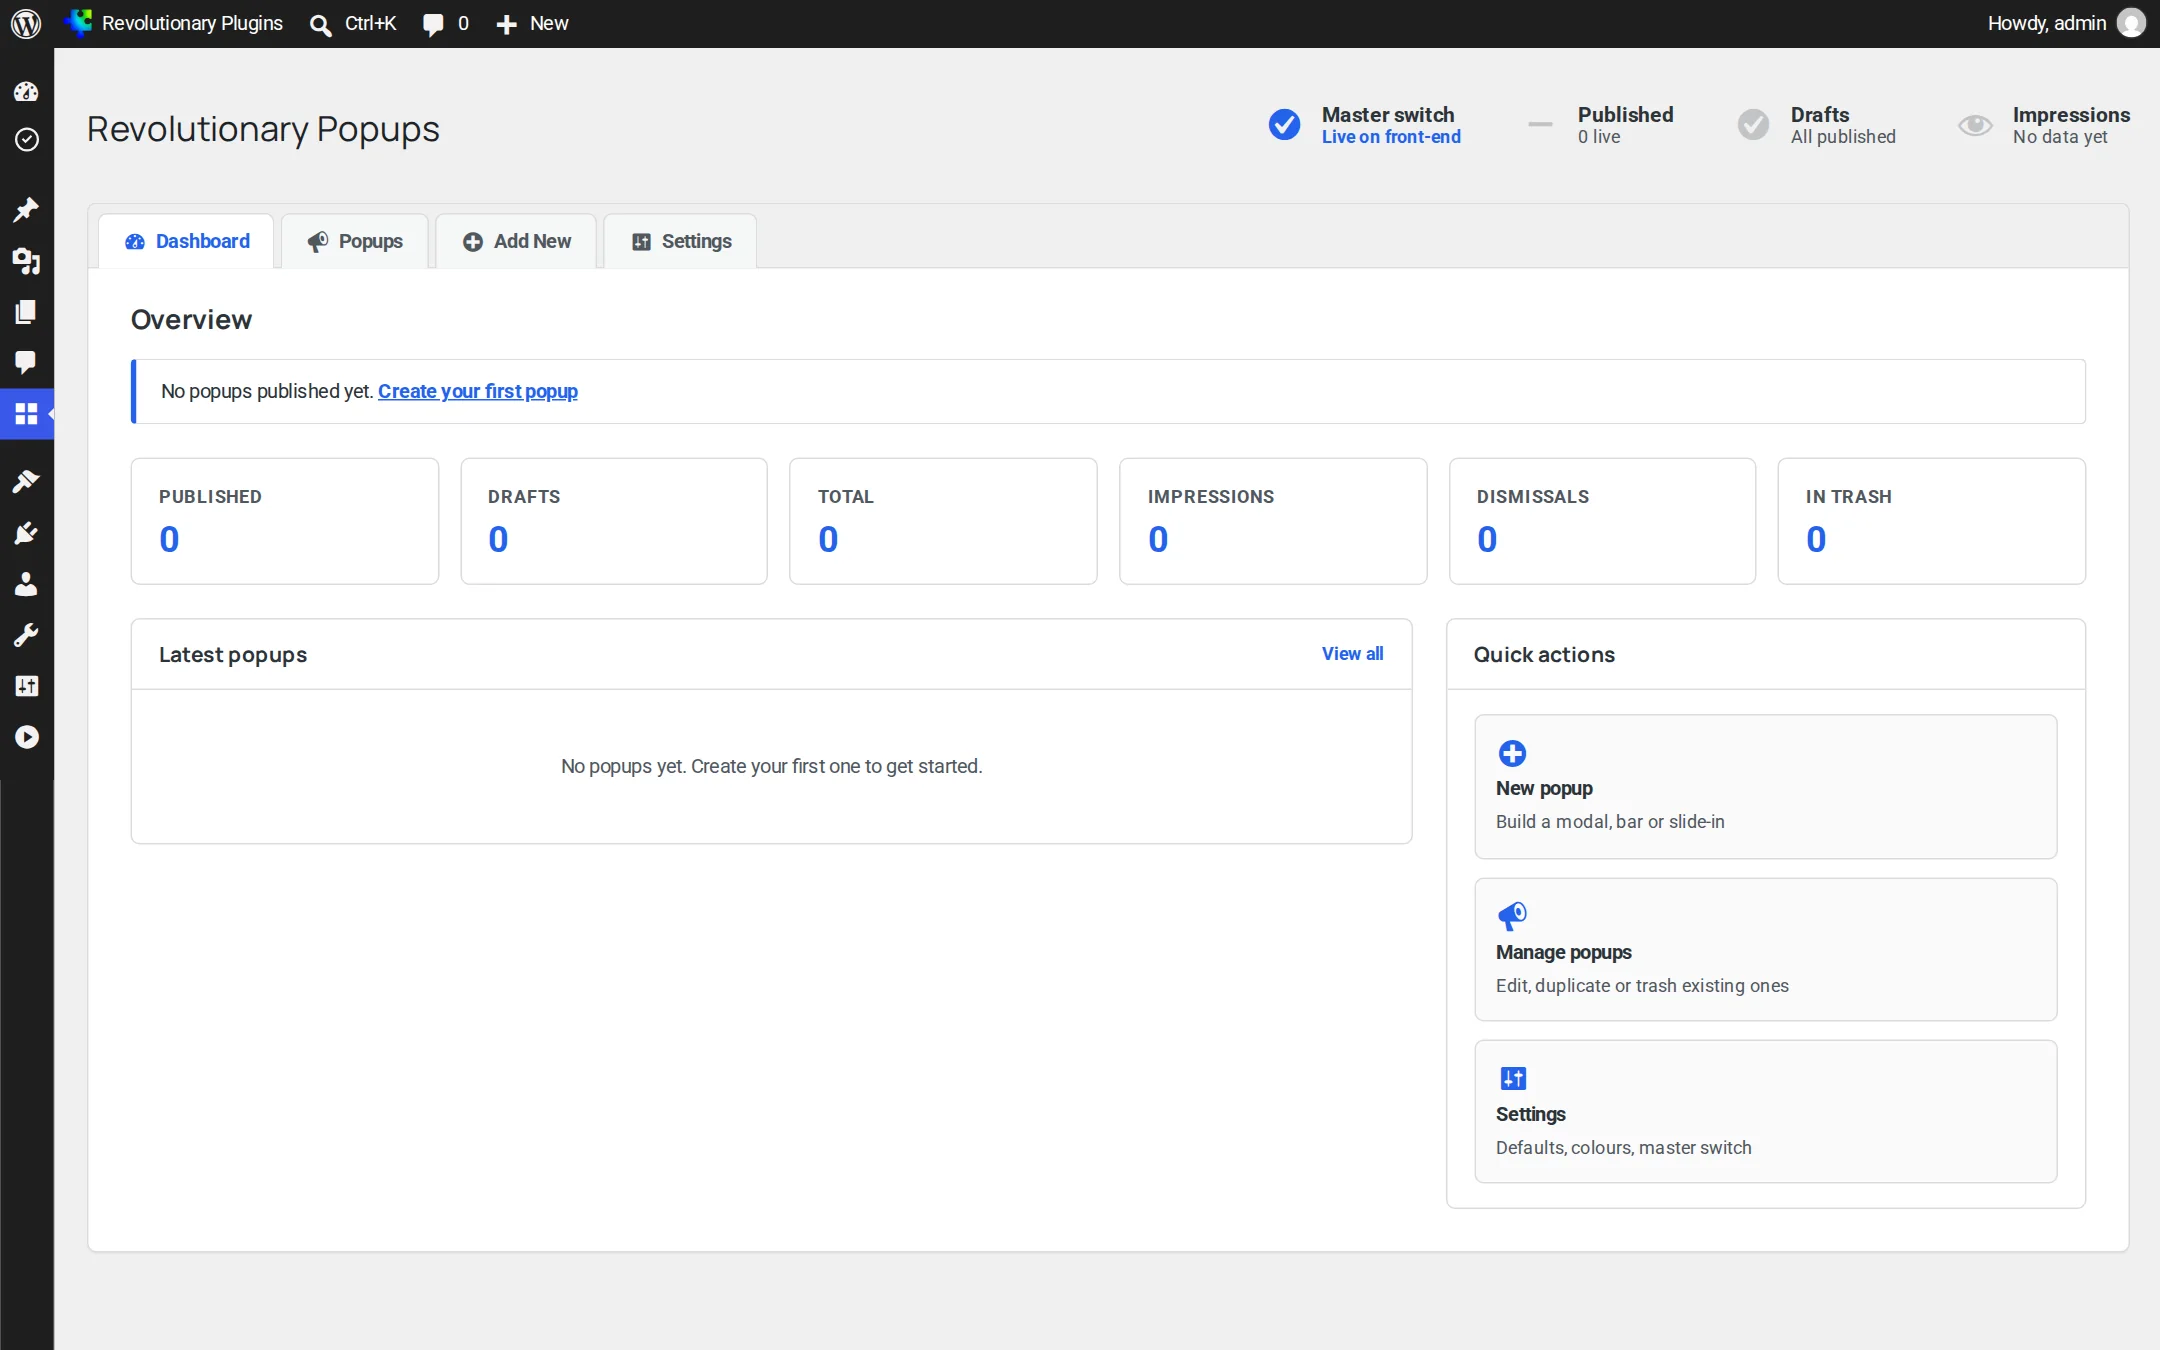
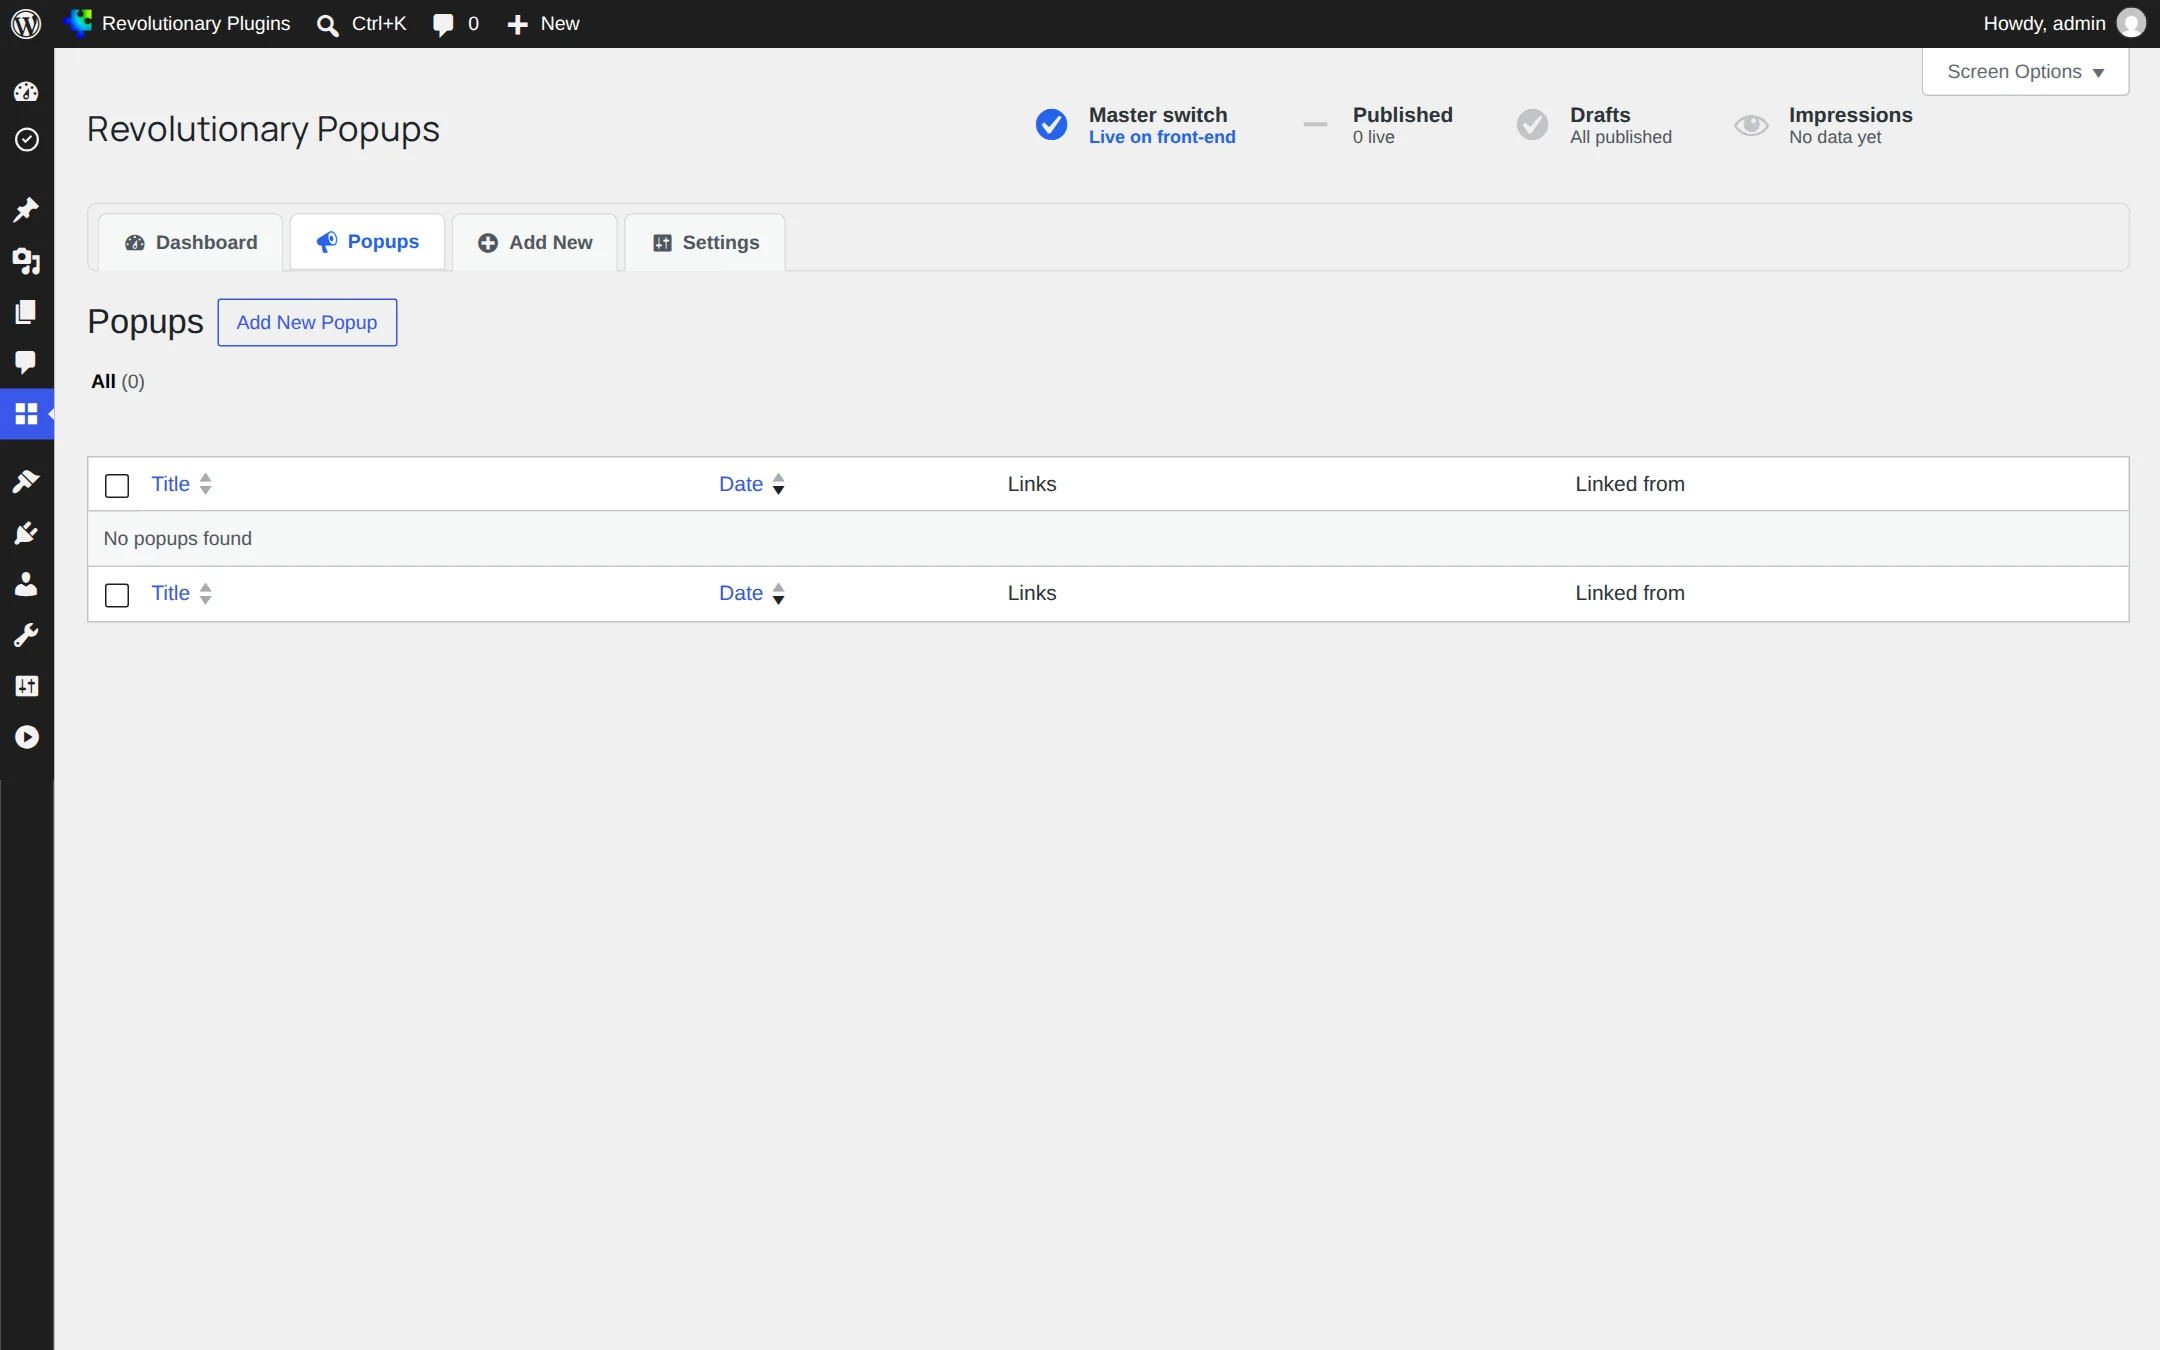
The full list of popups, with drafts and trash, is at Popups, View all.
Walkthrough
Create a popup
Everything about a popup is set on one form, in five cards: content, Trigger, Display rules, Layout and style, and Publish.
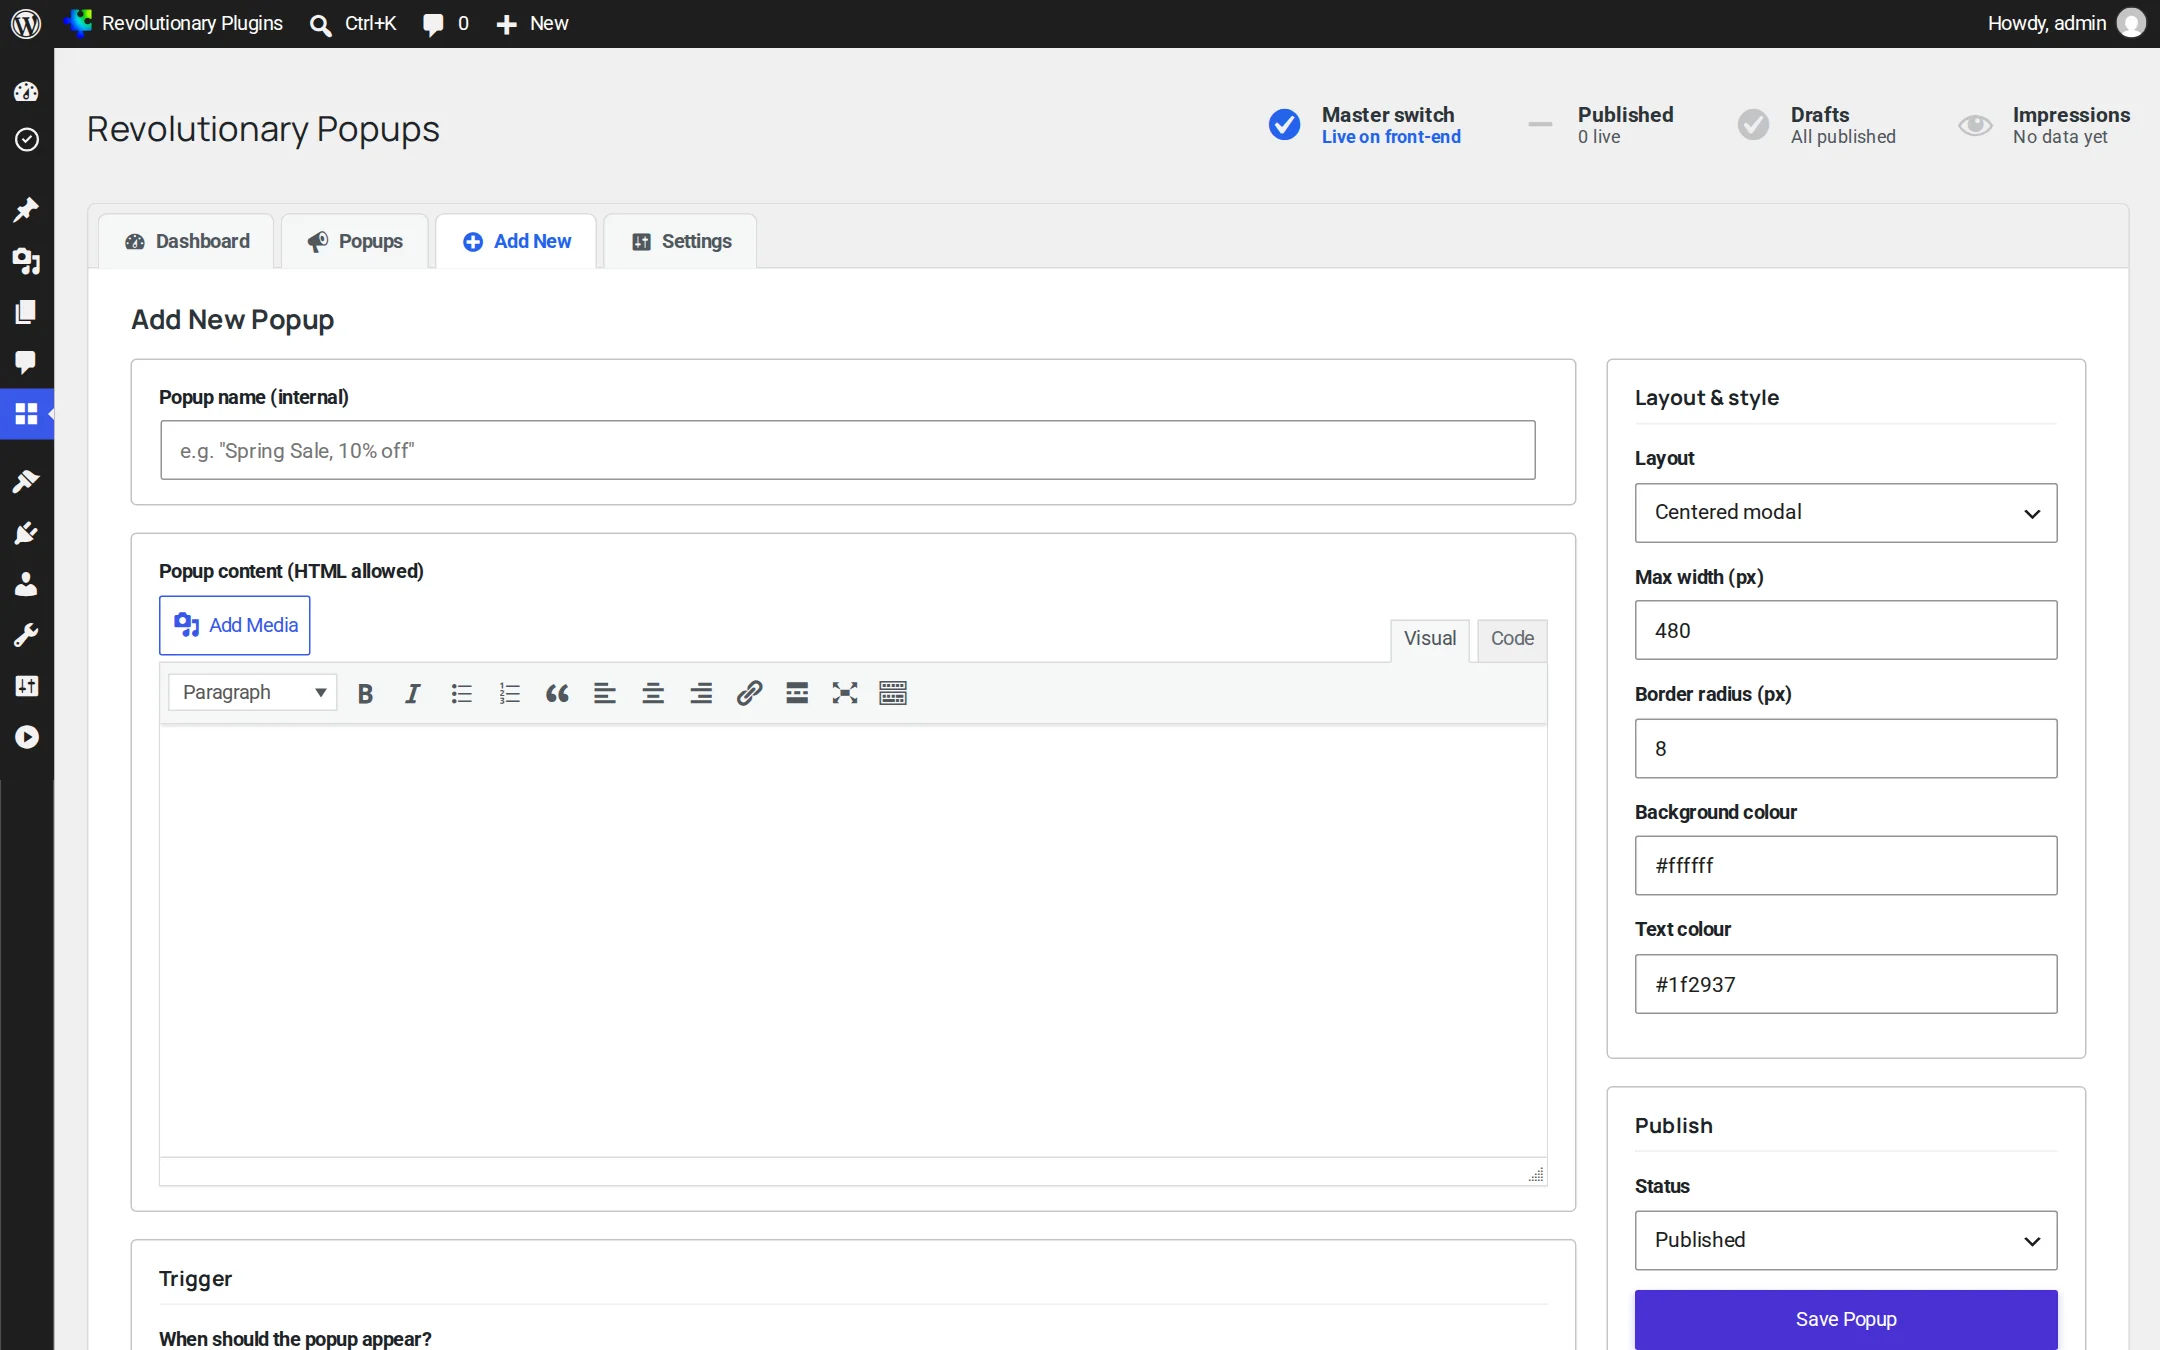
- 1. Click New popup on the overview.
- 2. Enter the popup name and the content. HTML is allowed, and shortcodes and embeds work.
- 3. Choose a trigger in the Trigger card.
- 4. Choose where it shows and how often in the Display rules card.
- 5. Pick a layout and set the width, corner radius and colors.
- 6. Set the status to Published and click Save Popup.
Contributors can create popups but can only save them as drafts. An editor or administrator publishes them.
When it appears
Triggers
Each popup has one trigger.
| Trigger | Setting | When it opens |
|---|---|---|
| On page load | None | As soon as the page is ready |
| After a time delay | Seconds to wait | After that many seconds |
| After scrolling | Scroll percentage, 1 to 100 | When the visitor has scrolled that far down the page |
| On exit intent | None | When the mouse leaves the top of the window |
| On click of a CSS selector | CSS selector | When the visitor clicks a matching element |
Example: open a popup from a button
- 1. Set the popup's trigger to On click of a CSS selector and enter .open-popup.
- 2. Give any button or link on your page the class open-popup.
- 3. Publish. Clicking the button opens the popup.
Targeting
Choosing where it shows
The Where to show setting in the Display rules card decides which pages a popup appears on by itself.
| Option | Shows on |
|---|---|
| Every page | The whole site |
| Home page only | The front page |
| URLs matching pattern(s) | Only paths that match one of your patterns |
| Every page EXCEPT pattern(s) | Everywhere but paths that match |
| Only when embedded via block / shortcode | Only pages where you place the popup |
Writing URL patterns
- One path per line, such as /pricing/.
- * matches anything, so /blog/* covers every post under /blog/.
- A pattern must match the whole path, and the trailing slash counts: /pricing/ does not match /pricing.
- Matching ignores upper and lower case, and the query string after ?.
How often
Frequency caps
The How often per visitor setting stops a popup from nagging.
| Option | Behavior |
|---|---|
| Every page view | Shows on every matching page |
| Once per session | Shows once per browser session |
| Once per day | Shows at most once every 24 hours |
| Once ever (after dismissal) | Never shows again once the visitor closes it |
Caps are remembered in the visitor's own browser storage. A visitor who clears their browser data, or uses another device, starts fresh.
Design
Layout and style
Each popup has its own layout and colors.
| Setting | Default | What it does |
|---|---|---|
| Layout | From Settings | Centered modal, top bar, bottom bar, or slide-in at the bottom right |
| Max width | 480px | The widest the popup can be |
| Border radius | 8px | How rounded the corners are |
| Background color | #ffffff | The popup's background |
| Text color | #1f2937 | The popup's text |
Only valid CSS color values are saved. Visitors can close any layout with the close button, by clicking the backdrop, or with the Escape key.
Placement
Embedding with the block or shortcode
Place a popup on a specific page, with or without its own trigger. After you save a popup, its shortcode is shown in the Embed card.
Shortcode
uses the popup's own trigger. Add trigger="load", "delay", "scroll", "exit" or "click" to override it on this page.
Block
In the block editor, insert the Revolutionary Popup block, choose the popup and, if you like, a trigger for this page.
The popup's markup is printed once in the page footer, however many times it is placed.
Site-wide
Settings
Administrators find settings at Popups, Settings.
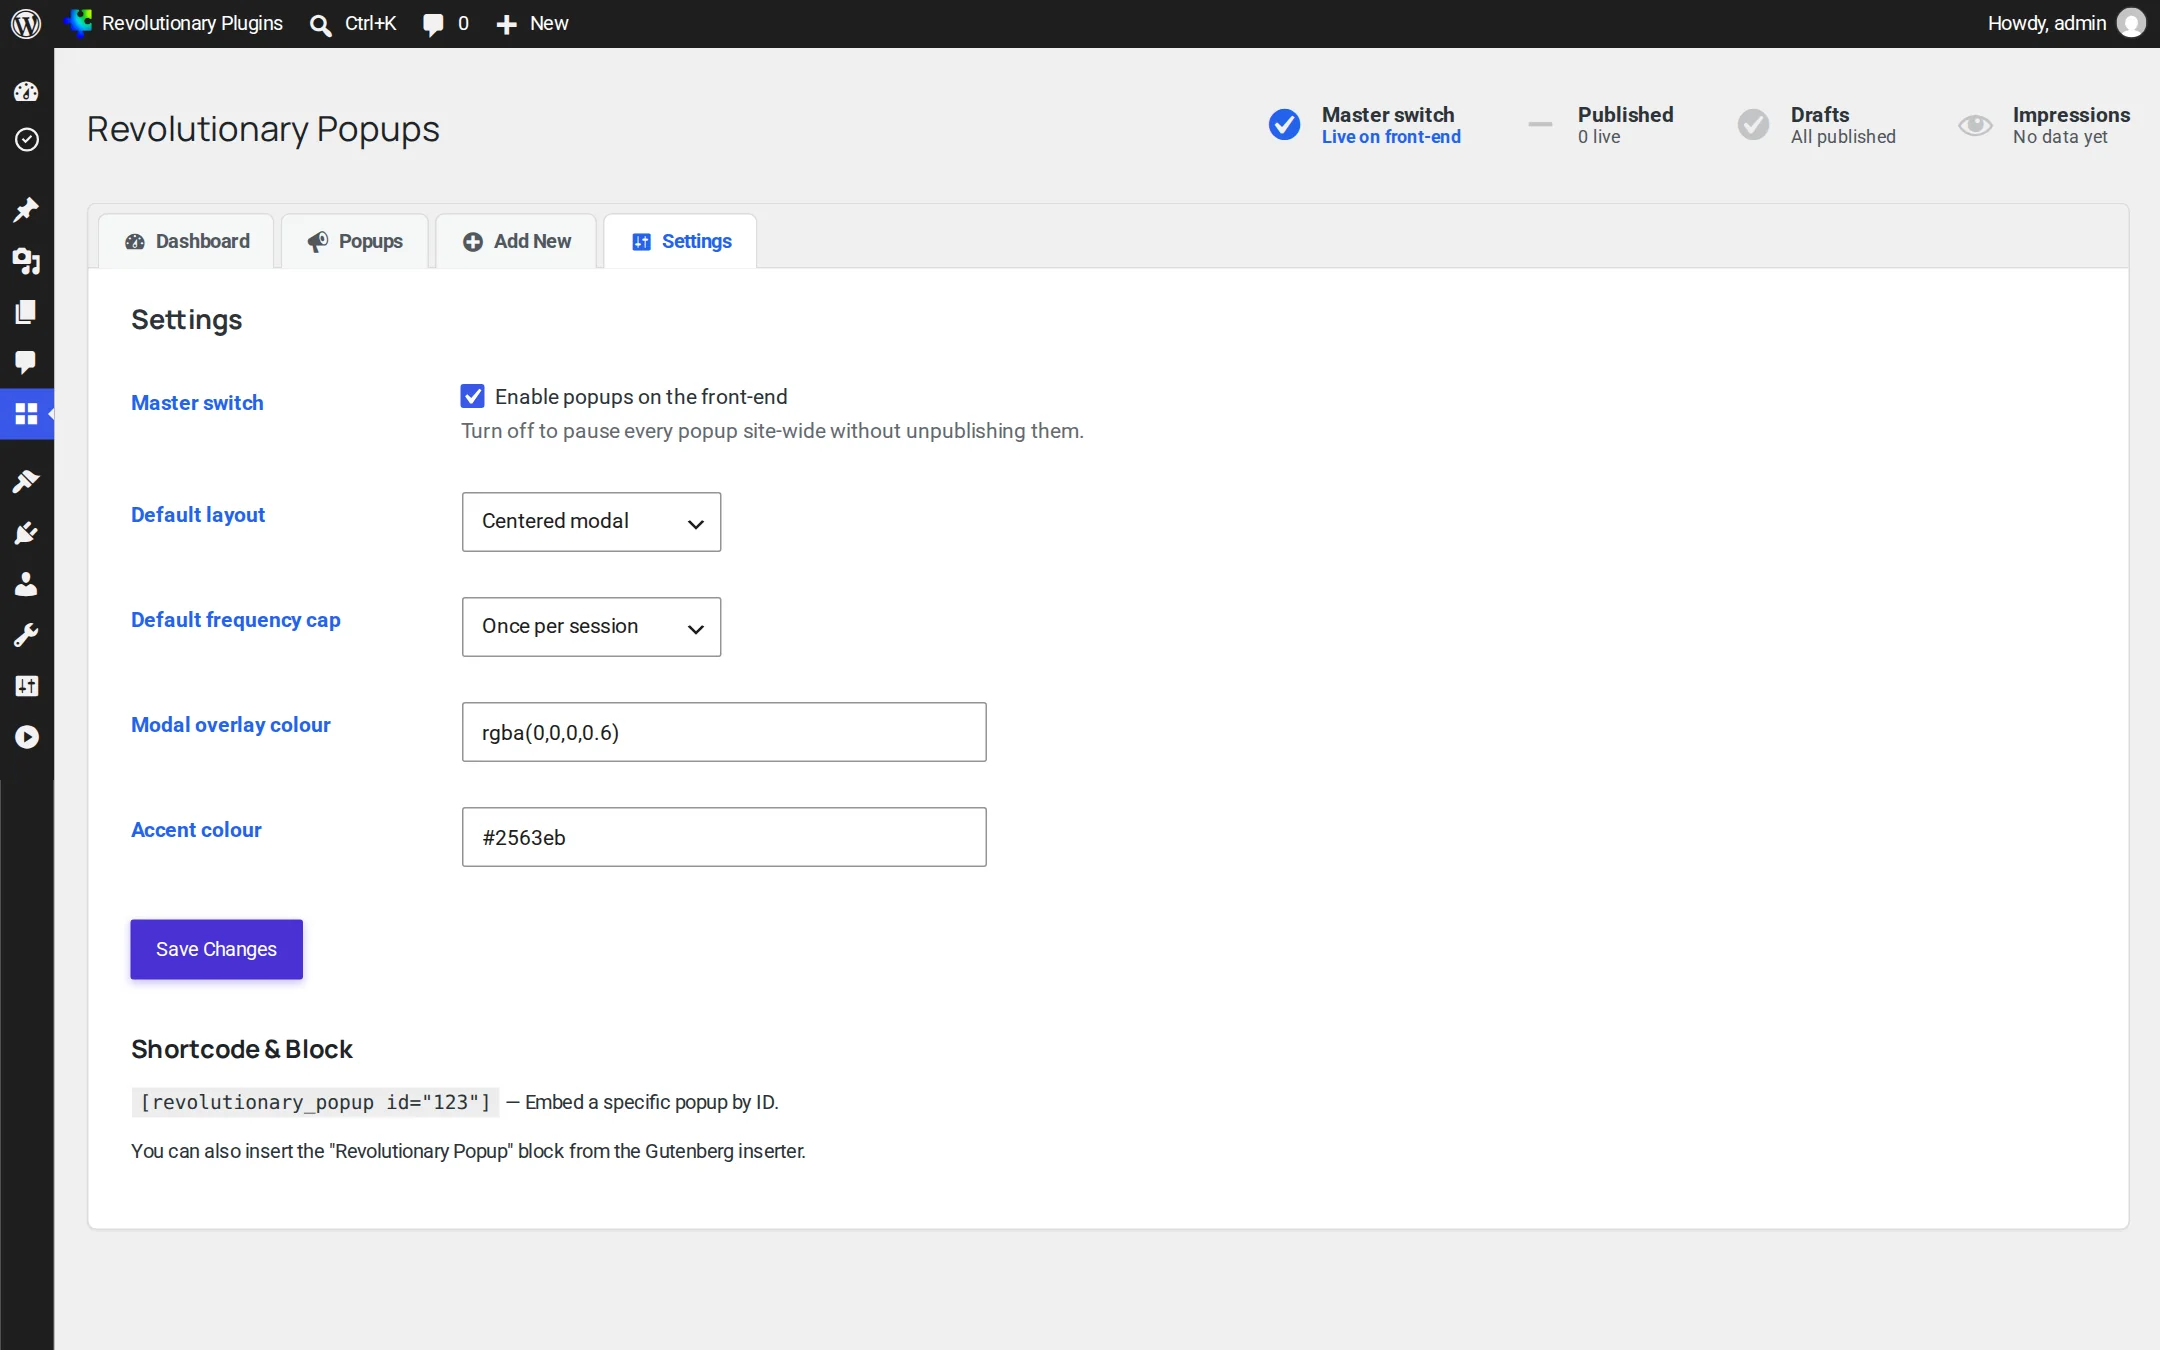
| Setting | What it does |
|---|---|
| Master switch | Turn off to pause every automatic popup site-wide without unpublishing them |
| Default layout | The layout new popups start with |
| Default frequency cap | The frequency new popups start with |
| Modal overlay color | The color of the dimmed backdrop behind a popup (default a 60 percent black) |
Results
Reading the stats
The overview shows total impressions (how many times popups were shown) and total dismissals (how many times visitors closed one).
Only published popups are counted. The totals are anonymous: no visitor data is stored on your site.
For developers
| Item | Name |
|---|---|
| Shortcode | [revolutionary_popup id="" trigger=""] |
| Post type | rp_popup |
| Per-popup impressions | _rp_impressions post meta |
| Totals | rp_total_impressions, rp_total_dismissals options |
| Settings | rp_settings option, removed on uninstall |
Optional layout
Native slide-in layout
Choose the native slide-in layout when a popup should appear beside the page instead of over its center.
The layout handles keyboard focus and reduced-motion preferences, and suspends while an open Ruby chat panel overlaps it. Preview on desktop and phone. Check dismissal, frequency limits and chat overlap with fictional content before publishing.
Troubleshooting
Common questions
Check that it is Published, that the master switch is on (for automatic popups), and that the display rule matches the page. You may also have hit the frequency cap already, so test in a private window.
No. It stops automatic popups only. Popups placed with the block or shortcode still load.
Patterns must match the whole path, including the trailing slash. Use /pricing/ for a page, or /pricing* to cover both forms.
Contributors can save popups only as drafts. Ask an editor or administrator to publish it.
Only valid CSS color values are accepted, such as #1e293b or rgba(0,0,0,.6).
Stuck on something?
Search the forums, open a ticket, or write to us. A real person reads every message.